
Key Takeaways✔ Always test the wallpaper adhesive before starting removal. ✔ Use proper tools like scoring tools and plastic scrapers to avoid wall damage. ✔ Avoid over-saturating the drywall with water to prevent bubbling or mold. ✔ Patch, skim coat, and sand the drywall before any finishing work. ✔ Prime the walls after repair to ensure smooth paint or wallpaper adhesion. ✔ Set realistic timelines—wallpaper removal is more labor-intensive than it looks. ✔ Hire a professional for painted-over, layered, or textured wallpaper. ✔ Choose experienced contractors who include full prep and repair in their service |
Wallpaper removal and drywall repair in older homes might seem like straightforward home improvement tasks, but without the right techniques, they can quickly become frustrating, costly, and pose health risks like respiratory issues. Whether it’s a DIY project or you’re hiring a professional wallpaper removal service, understanding what not to do is just as important as knowing the proper steps.
Here are seven most common mistakes homeowners in West Hartford, CT, should avoid when removing wallpaper and repairing drywall in older homes.
Not all wallpaper adhesives respond the same way—some dissolve with water or steam, while others resist even strong solvents. Skipping the adhesive test before wallpaper removal can lead to drywall damage, wasted time, and costly repairs. In older homes throughout West Hartford, CT, multiple wallpaper layers or strong adhesives are common, making it essential to test first for a safe, efficient removal.
Before jumping into full-scale wallpaper removal, conduct a simple adhesive test. Choose a small, inconspicuous spot—like behind a door or near the baseboard—and follow these steps:
Understanding the type of wallpaper also affects the removal method. If you’re unsure, a home wallpaper removal expert can identify it during a consultation. Here are a few common types:
One of the most common and costly mistakes homeowners make during wallpaper removal is using the wrong tools—or worse, using whatever is on hand. Kitchen knives, metal putty knives, or sharp blades may seem convenient, but these makeshift tools can gouge or tear the drywall beneath the wallpaper. This often results in uneven wall surfaces that require patching, sanding, and in some cases, full drywall repair.
In aged homes in West Hartford, CT, the drywall may already be fragile or poorly primed, increasing the risk of serious damage when improper tools are used.
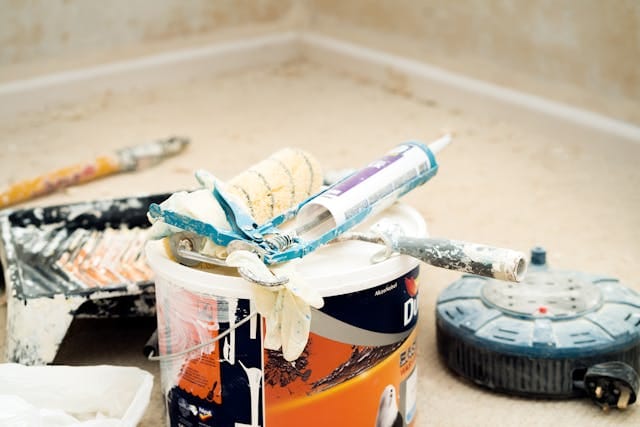
To remove wallpaper without damaging the wall, homeowners should equip themselves with the following tools:
Many homeowners make the mistake of using sharp or rigid metal tools—like putty knives or utility blades—for wallpaper removal. While these may seem effective at first, they often cause more harm than good by:
A professional wallpaper removal service in West Hartford, CT, comes prepared with commercial-grade tools and techniques that go beyond the average DIY kit. These include services for the best wallpaper removal near me include:
Many homeowners mistakenly believe that more water speeds up wallpaper removal. In reality, oversaturating the wall can cause a range of problems—especially in older homes, where drywall and plaster surfaces are often more fragile. Using too much water can:
To loosen wallpaper without damaging the wall, apply water gradually and precisely. Searching for the best wallpaper removal near me in West Hartford, CT, ensures quality results. Professionals recommend the following steps:
Failing to properly repair drywall after wallpaper removal is a mistake that can compromise the final finish of any wall. Wallpaper adhesives often leave behind residue, minor gouges, or torn drywall paper. If these imperfections aren’t addressed, they’ll remain visible under fresh paint or new wallpaper—and can even worsen over time due to bubbling, peeling, or uneven textures.
This is especially common in aged and historic houses throughout the city, where drywall may already have existing wear or prior damage. Skipping repair not only affects aesthetics but also reduces the durability of your new finish.
After removing the wallpaper, look for these indicators that the drywall requires attention:
To ensure a smooth, professional-looking surface, follow these essential repair steps:
Use a mild adhesive remover or warm water with a small amount of dish soap to clean off glue residue. Rinse and allow the wall to dry completely.
Apply joint compound (also known as drywall mud) to fill in dents, torn areas, or shallow gouges. A full skim coat may be necessary for larger or uneven sections.
Once the compound dries, sand the surface lightly to create a consistent, flat finish. Use a sanding block or pole sander for even results.
Apply a high-quality drywall primer to seal the surface, especially over patched areas. This step ensures better paint adhesion and an even finish.
One of the most overlooked—but most critical—steps after wallpaper removal and drywall repair is priming the wall before applying paint or new wallpaper. Bare or freshly patched drywall tends to absorb paint unevenly, leading to a blotchy, streaked, or dull finish. Likewise, applying wallpaper directly to unprimed drywall or joint compound can cause poor adhesion, which increases the risk of peeling or bubbling within weeks.
Primer acts as a barrier, sealing the surface and creating a consistent base for paint or adhesive. Skipping this step in home wallpaper removal compromises the final appearance and durability of your wall treatment—resulting in more work (and expense).
When the primer is ignored, homeowners may experience:
To ensure proper surface preparation, follow these steps:
For painting, use a high-quality drywall primer to seal the surface and ensure even color distribution. For wallpapering, use a primer-sealer to create a slick, non-porous surface that allows for easier future removal.
Ensure all joint compound is fully dry and sanded smooth before applying primer.
A roller is ideal for large areas, while a brush can help cut in edges. Apply a consistent coat without overworking the product.
Follow the product’s drying time before proceeding with paint or wallpaper to ensure proper adhesion.
Wallpaper removal and drywall repair are far more demanding than they appear. Many homeowners assume it’s a quick weekend project, only to find themselves overwhelmed by the time, physical effort, and attention to detail involved. Rushing through the process often results in:
Many homeowners in West Hartford, CT, search for the best wallpaper removal near me and turn to experienced professionals for good reason. Reputable contractors come prepared with the right tools, proven methods, and efficient workflows that dramatically reduce project time—without sacrificing quality.
Professional services like Custom Colonial Painting offer:
While a DIY approach may seem like a budget-friendly solution, it often ends up being more expensive and time-consuming when the job goes wrong. Wallpaper that was improperly installed, applied over unprimed walls, or layered with paint can be extremely difficult to remove without causing damage. Add in fragile drywall, unique textures, or structural imperfections, and you’re looking at a project that can quickly spiral out of control.
In situations like these, untrained removal methods can lead to torn drywall paper, uneven surfaces, mold exposure from over-wetting, or the need for full wall replacement. Especially in aged, traditional houses across West Hartford, CT, where wall conditions can vary significantly, knowing when to call in a professional is critical.
When deciding between DIY wallpaper removal and hiring a professional, it’s important to consider both the risks and costs. Although a DIY approach may appear cheaper upfront, improper techniques can damage your walls, leading to costly repairs. On average, professional wallpaper removal services cost between $422 and $1,190, depending on factors like room size and wallpaper type.
Proper preparation is key to a smooth and damage-free wallpaper removal process. Without it, homeowners risk unnecessary mess, damage to floors and trim, or delays that can complicate the project. Preparing the room ahead of time ensures efficiency, protects surfaces, and sets the stage for successful drywall repair and finishing.
All furniture should be removed from the room or moved to the center and covered with protective plastic. Wall art, switch plates, and outlet covers should be taken down to allow full access to the wallpapered surface.
Drop cloths or plastic sheeting should be used to cover flooring, baseboards, and adjacent surfaces. Painter’s tape can help seal edges and prevent water or adhesive remover from seeping into sensitive areas.
If wallpaper removal takes place near electrical outlets or switches, turning off power to those areas is a smart precaution—especially when water or steam is involved.
Preparation includes organizing all necessary tools ahead of time, such as a scoring tool, scraper, spray bottle or steamer, sponges, adhesive remover, and towels. This prevents disruption once the removal begins.
Trusted contractors offering professional wallpaper removal in West Hartford, CT, always begin with adhesive testing. It’s a crucial step in assessing:
Neglecting to test the adhesive before removal can result in:
Hiring a professional wallpaper removal service means gaining access to specialized tools, expert techniques, and years of hands-on experience with affordable wallpaper removal. These professionals don’t just remove wallpaper—they assess wall conditions, minimize risk, and ensure surfaces are left clean and ready for the next finish.
Here’s what sets the pros apart:
Always begin with an adhesive test. This helps determine how the wallpaper responds to moisture or removal solutions. Skipping this step is one of the most common causes of torn drywall and unnecessary damage.
Yes. Oversaturating the wall can weaken the drywall, cause bubbling, and promote mold growth. A light, controlled misting is best. Professional wallpaper removal services use tools and techniques that limit moisture exposure while effectively loosening the adhesive.
Absolutely. Most walls will have leftover adhesive, nicks, or torn drywall paper that must be patched, skim-coated, sanded, and primed. Skipping this step leads to visible flaws in your final finish and can shorten the lifespan of your paint or new wallpaper.
Primer seals patched areas and ensures even paint or wallpaper adhesion. Without it, surfaces can absorb paint unevenly or cause new wallpaper to peel. Skilled contractors always include primer in their prep process for a flawless, long-lasting finish.
DIY works for simple jobs, but you should hire a pro if your walls have multiple wallpaper layers, painted-over wallpaper, or underlying damage. Professionals in West Hartford, CT, like Custom Colonial Painting, ensure safe removal, full drywall repair, and a clean, paint-ready surface—saving time, stress, and costly repairs.
Wallpaper removal and drywall repair are critical steps in creating a clean, polished interior—but only when done correctly. Avoiding common mistakes like over-saturating walls, skipping primer, or using the wrong tools can prevent costly damage and rework. For homeowners in West Hartford, CT, these errors are all too common with delicate or layered finishes. Trusting experienced professionals ensures the job is done safely, efficiently, and with results that last.
Contact West Hartford House Painting Experts today for professional wallpaper removal and drywall repair in West Hartford, CT. Let our expert team handle the hard work—so you can enjoy affordable wallpaper removal without the stress.