Google Reviews

Free Estimates Here

West Hartford WallpaperRemoval

Wallpaper Removal Solution Secrets That Save Time and Prevent Wall Damage

Table of Contents

Key Takeaways

Identify the wallpaper material to choose the safest and most effective removal method.

Gently peel a corner to see how easily it detaches and adjust the approach as needed.

Apply a proven wallpaper removal solution to break down adhesive without harming the wall.

Lightly score the surface to help the solution penetrate stubborn wallpaper layers.

Allow enough soaking time so the adhesive loosens fully for smoother removal.

Use a plastic scraper to lift wallpaper without damaging the drywall underneath.

Wash off leftover glue, check for damage, and prepare the surface for its next finish

Wallpaper remains a popular design choice in homes and commercial spaces across the U.S., with the market expected to reach over $700.5 million by 2030. As more people embrace wallpaper for its style and personality, the need for safe and efficient removal methods also grows—especially when preparing for a new look or preserving wall quality.

Here are essential wallpaper removal solution secrets that save time and prevent wall damage

How to Remove Wallpaper Quickly and Safely

1. Assess the Wallpaper Type

Understanding what kind of wallpaper is on the wall is the first step in any safe and efficient removal process. Different wallpaper materials react differently to moisture, heat, and tools. 

Identify The Wallpaper Material

Each wallpaper type needs its own removal strategy. Knowing what you’re dealing with saves time and prevents wall damage.

  • Vinyl-Coated Wallpaper: This type is moisture-resistant and often found in bathrooms and kitchens. It usually has a plastic-like surface that blocks liquid, making it harder for solutions to soak through.
  • Fabric-Backed Wallpaper: Known for its durability and texture, this material is tougher to peel and may need more intensive methods like steaming or multiple solution applications.
  • Peelable Wallpaper: Often labeled as “strippable,” this wallpaper can be removed without much effort. It typically leaves a paper backing that still needs to be soaked and scraped off.
  • Traditional Paper Wallpaper: This older type absorbs water easily, making it ideal for solution-based removal methods but also more prone to tearing.

How The Type Affects Removal Method

Knowing the wallpaper’s material helps in choosing between scraping vs. steaming wallpaper and whether to try DIY methods or call in a pro.

  • Solution Soaking Time: Vinyl or sealed wallpapers may require scoring before applying a wallpaper removal solution, while paper-based types absorb liquid easily and come off faster.
  • Tool Selection: A plastic scraper works best on delicate surfaces, while fabric-backed wallpaper may require both scoring and steaming.
  • Effort Level: Peelable wallpaper is easiest to remove manually, while fabric and vinyl types can demand more work or even a professional wallpaper removal service.

2. Test Adhesion First

Understanding how well the wallpaper sticks to the wall is the first step in planning an efficient and safe removal process. This quick check helps determine the condition of the wall underneath and which wallpaper removal solution or method will be most effective.

Start With A Simple Peel Test

Before applying any solution, it’s important to test a small area. This reveals how the wallpaper is attached and whether it will come off easily or need more effort.

  • Choose A Hidden Corner: Select a spot behind a door or near the floor to gently lift the edge of the wallpaper.
  • Observe The Resistance: If the paper lifts easily in large sheets, the adhesive is likely weak or the wall was properly primed. If it tears in small bits or feels firmly glued, more aggressive methods may be needed.

Why Adhesion Matters

Testing adhesion can prevent unnecessary damage and guide the right choice between scraping vs. steaming wallpaper.

  • Indicates Wall Preparation: If the wall was primed before installation, removal will be faster and cleaner. Unprimed walls may require extra care and safe wallpaper removal techniques to avoid drywall damage.
  • Saves Time And Tools: Understanding the level of adhesion early means fewer surprises and helps decide whether a DIY wallpaper removal tip will work or if a professional wallpaper removal service is a better choice.

Plan The Next Steps Based On Adhesion

Once adhesion is tested, the proper course of action can be chosen with confidence.

  • Easy Peel? Use A Mild Solution: If the wallpaper peels easily, a gentle wallpaper removal solution like warm water mixed with vinegar might be enough.
  • Tough Adhesion? Consider Scoring Or Steaming: For stubborn paper, scoring the surface allows solution penetration. In some cases, using steam might be more effective, especially when comparing scraping vs. steaming wallpaper options.

3. Use the Right Removal Solution

Choosing the correct wallpaper removal solution is one of the most important steps in avoiding wall damage and saving time. Whether opting for a commercial product or a DIY mix, the goal is to loosen the adhesive safely and effectively.

Understanding Removal Options

Before beginning, it’s helpful to understand the different types of solutions available. The wrong choice can make the job harder and even risk damage to the drywall.

  • Store-Bought Solutions: These are ready-to-use products that are specifically formulated to dissolve wallpaper paste. They’re ideal for those seeking convenience and consistent results.
  • DIY Mixes: A popular and effective do-it-yourself wallpaper removal tip is to mix equal parts white vinegar and warm water. This homemade solution helps break down the glue without harsh chemicals.
  • Warm Water: Regardless of the method used, warm water plays a key role in loosening wallpaper adhesive. The heat helps make the glue more fluid, softening its grip and allowing the wallpaper to peel or scrape away more easily—without stressing the wall surface.

4. Score the Wallpaper

Scoring is a critical step in effective wallpaper removal. It helps the wallpaper removal solution soak through the surface and reach the adhesive underneath. Without proper scoring, the solution may not penetrate fully, making the removal much harder and increasing the risk of wall damage.

Why Scoring Is Necessary

Wallpaper, especially vinyl-coated or washable types, often repels moisture. This makes it difficult for any solution to seep through unless the surface is broken.

  • Enables Solution Penetration: Scoring creates small holes in the wallpaper, allowing the wallpaper removal solution to soak into the adhesive layer.
  • Improves Effectiveness of DIY Techniques: For those using DIY wallpaper removal tips, proper scoring increases the chance of success without using heavy-duty tools.

When To Use a Scoring Tool

Not all wallpapers need to be scored. Before using a tool, test a corner or edge of the wallpaper.

  • Vinyl or Washable Surfaces: These types require scoring because the surface resists moisture.
  • Wallpaper That Won’t Peel Easily: If the top layer doesn’t separate or peel by hand, scoring is necessary to proceed with safe wallpaper removal techniques.

How To Score Wallpaper Safely

Using the right method and tool can prevent accidental wall damage.

  • Use a Purpose-Built Scoring Tool: Tools designed for wallpaper have small rotary blades that lightly perforate the surface without cutting too deep.
  • Work in Circular Motions: This ensures even coverage across the paper and maximizes the effect of the removal solution.
  • Apply Gentle Pressure: Excessive pressure can puncture the drywall underneath, leading to repairs.

Common Mistakes To Avoid

Scoring should be strategic, not aggressive. Over-scoring can cause more harm than good.

  • Avoid Deep Cuts Into the Wall: Pressing too hard may damage the drywall, especially if the wall was not properly primed before wallpaper was installed.
  • Don’t Score Over Wet Surfaces: Moist areas can cause the blades to drag, increasing the chance of tearing into the wall.

5. Let the Solution Soak

Applying a wallpaper removal solution is only half the job—letting it soak properly is what actually softens the adhesive and makes the removal process easier and safer. Skipping or rushing this step often leads to extra scraping, wall damage, and frustration.

Why Soaking Time Matters

Giving the wallpaper removal solution enough time to work helps avoid unnecessary scraping and keeps the wall surface intact. Letting it sit allows it to fully break down the glue beneath the wallpaper.

  • Breaks Adhesive Bonds More Effectively: A longer soak lets the solution penetrate through the wallpaper layers and dissolve the glue completely.
  • Reduces Wall Damage: Proper soaking is a key part of safe wallpaper removal techniques, lowering the risk of tearing the drywall or pulling off plaster.
  • Saves Time During Scraping: Softer wallpaper lifts more easily, reducing time spent on physical removal and the need for repeat applications.

Tools That Help the Solution Soak In

Keeping the wall moist for the right duration can be a challenge, especially with thicker or vinyl-coated wallpaper.

  • Plastic Sheeting: Taped lightly over the wall, it locks in moisture and prevents the wallpaper removal solution from drying too quickly. This is especially helpful for large sections.
  • Soaked Towels or Sponges: Pressed against the wall after applying the solution, these hold moisture in place and ensure even saturation. This is a practical DIY wallpaper removal tip when working in small areas or corners.
  • Spray Bottles or Garden Sprayers: These help apply the solution evenly and keep the area wet as needed. For tougher adhesives, re-spraying may be necessary to maintain dampness.

Timing Recommendations for Best Results

How long to let the solution soak depends on the type of wallpaper and adhesive used.

  • For Light Adhesives: 10–15 minutes is often enough.
  • For Heavy or Old Adhesives: 20–30 minutes may be needed, sometimes followed by a second application.

6. Gently Scrape With the Proper Tool

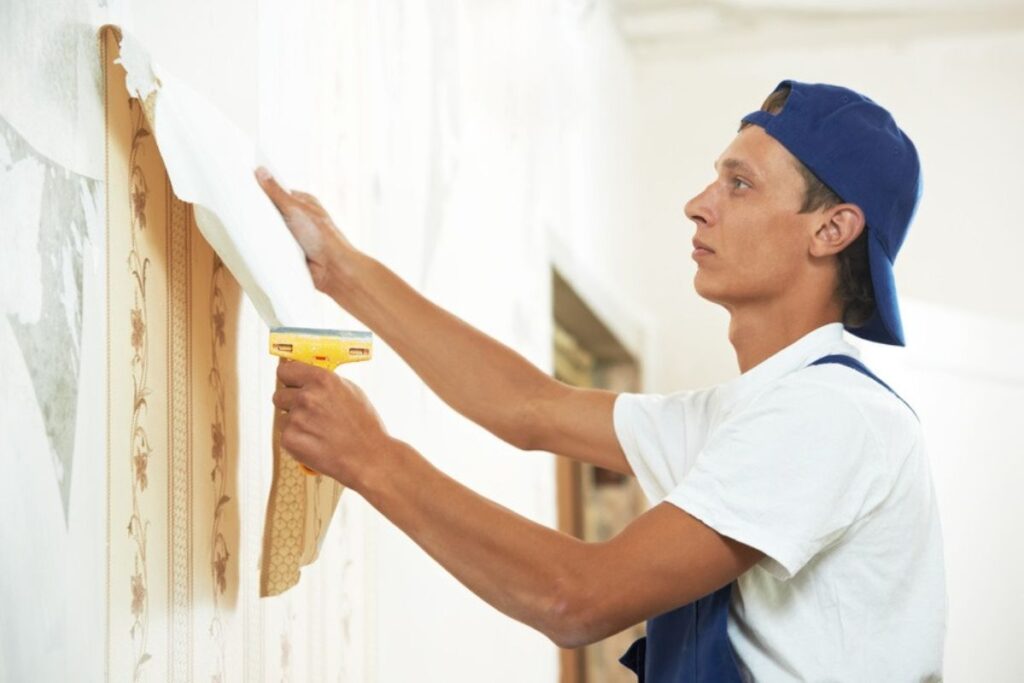
Removing wallpaper can be delicate work, especially when trying to protect the wall underneath. The right tools and techniques are critical to avoid unnecessary damage. 

Choose the Right Scraping Tool

Not all tools are created equal when it comes to wallpaper removal. A plastic putty knife is often the safest and most effective choice.

  • Plastic Putty Knife: These are less likely to gouge or scratch walls compared to metal scrapers, making them ideal for maintaining surface integrity during wallpaper removal.
  • Flexible Blade Design: A flexible blade adjusts to wall curves and irregularities, making the scraping process smoother and less damaging.
  • Avoid Sharp-Edged Tools: Tools with sharp metal edges can dig into drywall and cause permanent marks that require patching.

Techniques for Stubborn Wallpaper Sections

Some areas may resist even the best tools and solutions. In these cases, technique matters just as much as the tool itself.

  • Work in Small Sections: Scrape gradually in manageable patches to avoid tearing or damaging the wall underneath.
  • Reapply Solution as Needed: If paper resists peeling, reapply the wallpaper removal solution and wait a few minutes. The extra soak time softens glue for easier removal.
  • Use Gentle Pressure: Let the solution do the heavy lifting. Pushing too hard can dent or gouge walls, especially on unprimed drywall.
  • Switch Angles: Approaching from different angles helps dislodge tougher spots without prying forcefully. 

7. Clean And Prep The Wall After Removal

After the wallpaper has been removed, it’s essential to properly clean and prepare the walls. This ensures a smooth, damage-free surface that’s ready for painting or a fresh layer of wallpaper. 

Remove Leftover Adhesive With Care

Even after the wallpaper is gone, adhesive residue can linger on the wall. Using the right approach will protect the surface and avoid future issues with finishes.

  • Use a Gentle Cleaning Solution: A mix of warm water and mild dish soap is often effective at loosening leftover glue without harming the wall.
  • Apply With a Sponge or Cloth: A soft sponge allows better control while cleaning, minimizing the chance of over-saturating the drywall.
  • Rinse and Wipe Dry: After scrubbing, rinse the area with clean water and dry it thoroughly to prevent moisture damage.

Inspect The Walls For Damage

Once the adhesive is cleaned off, it’s time to assess the wall’s condition. This is an important step whether the wallpaper was removed using scraping vs. steaming wallpaper methods.

  • Check For Dents and Holes: Small holes from nails or gouges from tools should be filled with a lightweight spackle.
  • Look For Peeling Drywall Paper: Gently sand any peeling areas and seal them with a primer if needed.
  • Scan for Moisture Issues: Areas that feel damp may need more drying time or indicate a deeper issue behind the wall.

Prep the Wall for a New Finish

Proper prep helps paint or new wallpaper stick better and last longer. Whether it’s a DIY wallpaper removal tip or part of a professional wallpaper removal service, prepping is a must.

  • Sand the Surface Smooth: Use fine-grit sandpaper to remove any raised bits and ensure a flat surface.
  • Prime Bare Drywall or Patched Areas: Primer seals the wall, prevents stains, and creates a clean base for the next layer.
  • Clean Off All Dust: After sanding, use a tack cloth or vacuum with a brush attachment to remove dust before applying anything new.

When To Consider Professional Help

While many wallpaper projects can be tackled independently, certain situations call for expert support. In these cases, a professional wallpaper removal service in West Hartford, CT, can prevent costly damage and ensure the job is done efficiently using safe wallpaper removal techniques.

1. Multiple Layers of Wallpaper

Walls with several layers of wallpaper can be difficult to penetrate and remove cleanly. Professionals have tools and experience to handle these complex removals without harming the surface underneath.

2. Heavy Adhesive or Vinyl Wallpaper

Some types of wallpaper, like vinyl-backed or commercial-grade materials, are designed to last—and so is their glue. Removing these without the right equipment can damage the wall, making expert help a smart choice.

3. Visible Wall Damage During Removal

When drywall begins to peel or crumble, it’s best to stop and consult a specialist. A trained team can safely continue the process and repair any issues without making things worse.

4. Lack of Proper Tools or Time

Effective wallpaper removal often requires scoring tools, steamers, or specialized wallpaper removal solutions. Hiring a pro saves time and ensures the process stays on track with minimal disruption.


Frequently Asked Questions

Can I paint over wallpaper instead of removing it?

While it is possible to paint over wallpaper, it’s generally not recommended. The paint may not adhere properly, and seams or textures can show through the finished surface. If the wallpaper is in excellent condition and well-adhered, you might get away with it after priming. However, for best results, removing the wallpaper is always the better option.

How long does it take to remove wallpaper?

The time it takes to remove wallpaper varies based on room size, type of wallpaper, and method used. On average, it can take a few hours to an entire day for a standard room. More stubborn or layered wallpapers can take longer. Proper preparation and tools can significantly speed up the process.

Can I reuse wallpaper after removing it?

Most traditional wallpaper is not designed to be reused once removed. The adhesive backing typically gets damaged or loses its stickiness during the removal process. Even peel-and-stick wallpaper can stretch or tear, making it difficult to reapply smoothly. If reusability is a concern, it’s best to use removable wallpaper that’s specifically labeled as reusable.

Can I use a hair dryer instead of a wallpaper steamer?

A hair dryer may work in small areas by heating the adhesive, but it’s not as effective as a steamer. It doesn’t produce enough consistent heat or moisture to loosen large sections of glue. This method can be helpful for stubborn corners or edges. For full rooms, a wallpaper steamer is more practical and efficient.

How can I tell if there’s adhesive left on the wall?

You can often feel leftover adhesive as a sticky or rough residue on the wall. Sometimes it appears shiny or slightly darker than the rest of the surface. Wiping the wall with a damp sponge can help reveal sticky areas. It’s important to remove all adhesive before painting or refinishing.

Book Trusted Wallpaper Removal With Lasting Results!

Tackle stubborn wallpaper and adhesive the right way with help from West Hartford House Painting Experts, the trusted name for interior surface prep in West Hartford, CT. Using proven methods and a careful approach, our local team ensures clean walls and smooth surfaces ready for paint or new wallpaper.

Call West Hartford House Painting Experts today to schedule your wallpaper removal service!