

When it comes to painting your walls, preparing your drywall is essential for achieving a professional-looking finish. Drywall preparation involves repairing any damages, cleaning the surface, and priming it to ensure the paint adheres well and looks smooth. This article will guide you through each step of preparing drywall for painting.
By inspecting the surface of your drywall, you can identify any areas that need to be repaired or sanded down before painting. Here are the steps to properly inspect the surface of your drywall:
Make sure you have adequate lighting when inspecting your drywall. This will help you see any imperfections on the surface.
Take a close look at the surface of the drywall, looking for any holes, cracks, dents, or other defects. Use a flashlight or other light source to help you see clearly.
Use a pencil or marker to mark any defects you find. This will make it easier to locate them later when it’s time to repair them.
Run your hand over the surface of the drywall to check for any rough spots or unevenness. If you notice any rough spots, mark them for sanding later.
Check for water stains or mold on the surface of the drywall. If you notice any, you’ll need to take care of the underlying issue before proceeding with the preparation process.
If you find any defects or imperfections in the drywall during the inspection process, it’s important to fix them before you proceed with the preparation process. While minor imperfections can be patched with spackle or joint compound, larger defects may require a more involved repair process. If you lack the time and expertise to repair the drywall, consider hiring professional painting contractors in West Hartford, CT, to help. They have the expertise to inspect and repair drywall before painting.
Patching holes and cracks in drywall ensures a smooth surface for paint, prevents further damage, and improves the appearance of walls. It’s essential for achieving a professional-looking finish and maintaining drywall’s integrity.
Here are the steps to patch holes and cracks in your drywall:
Use a dry cloth or brush to remove any debris or dust around the hole or crack. This will help the patching material adhere better to the surface.
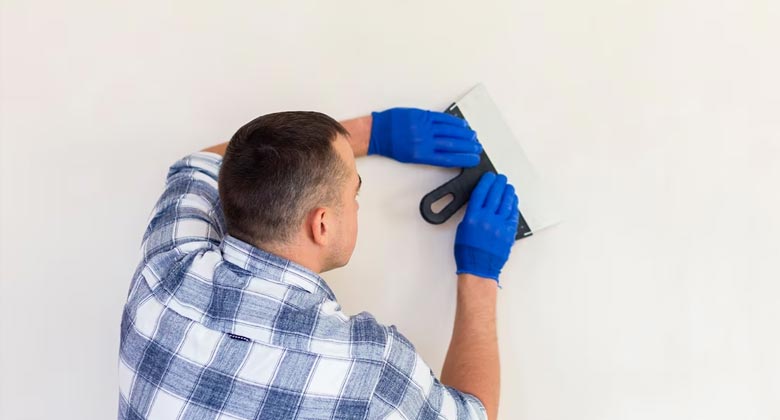
Use a putty knife to apply the spackle or joint compound to the hole or crack. Make sure the patching material completely fills the hole or crack. Smooth the surface of the patching material with the putty knife.
Wait for the patching material to dry completely. This usually takes about 24 hours but can take longer in humid conditions.
Once the patching material is dry, use sandpaper to smooth the surface. Start with coarse-grit sandpaper and gradually move to finer grit. Sand the surface until it’s smooth and level with the surrounding drywall.
If you notice any bumps or unevenness in the patched area, repeat the process by applying more patching material and sanding again until the surface is completely smooth.
If you’re not confident in patching holes and cracks in your drywall, consider hiring professional painting contractors in West Hartford, CT. They have the expertise to handle all aspects of drywall preparation, including patching holes and cracks.
Cleaning the surface is an important step in preparing drywall for painting. This ensures that the paint will adhere properly, guaranteeing a long-lasting result. Here are the steps to properly clean the surface of your drywall:
Before you start cleaning the surface of your drywall, remove any furniture or decorations from the room. This will give you more space to work and prevent any damage to your belongings.
Use a dry cloth or brush to remove any dust or debris from the surface of the drywall. This will help ensure that the surface is completely clean before you proceed with cleaning.
Mix a cleaning solution by combining warm water and mild soap or detergent in a bucket. Avoid using harsh chemicals, as they can damage the drywall.
Dip a sponge or cloth into the cleaning solution, and wring out any excess water. The sponge or cloth should be damp but not soaking wet.
Use the damp sponge or cloth to wipe the surface of the drywall, starting from the top and working your way down. Make sure to clean the entire surface of the drywall, including corners and edges.
After cleaning the surface, rinse it with clean water using a clean sponge or cloth. This will help remove any remaining soap or detergent.
Allow the surface to dry completely before proceeding with the next step of preparing the drywall for painting. This will usually take a few hours, depending on the humidity and temperature of the room.
Consider hiring professional painting contractors in West Hartford, CT if you’re not confident in your ability to properly clean the surface of your drywall. These experts have the knowledge and experience to ensure that your drywall is completely free of dirt and debris before the painting process begins.
Sanding the surface will smooth out any rough spots or unevenness and make it easier for the paint to adhere well. Here are the steps for sanding your drywall surface:
Before you start sanding, make sure you have all the necessary materials. You’ll need sandpaper or a sanding block, a dust mask, safety glasses, and a vacuum or brush to clean up the dust.
Begin by using coarse grit sandpaper to remove any rough spots or unevenness on the surface. Sand in one direction, and avoid applying too much pressure. Be careful not to sand too much or too hard, as this can damage the drywall.
After using coarse grit sandpaper, switch to finer grit sandpaper to achieve a smoother surface. Again, sand in one direction and avoid applying too much pressure.
Once you’ve finished sanding, use a vacuum or brush to clean up any dust or debris from the surface. Wear a dust mask and safety glasses to protect yourself from inhaling any dust particles.
Sanding the surface can be a time-consuming and challenging process, especially if you’re not experienced in DIY projects. If you don’t have the time to sand your drywall surface, consider hiring professional painting contractors in West Hartford, CT.
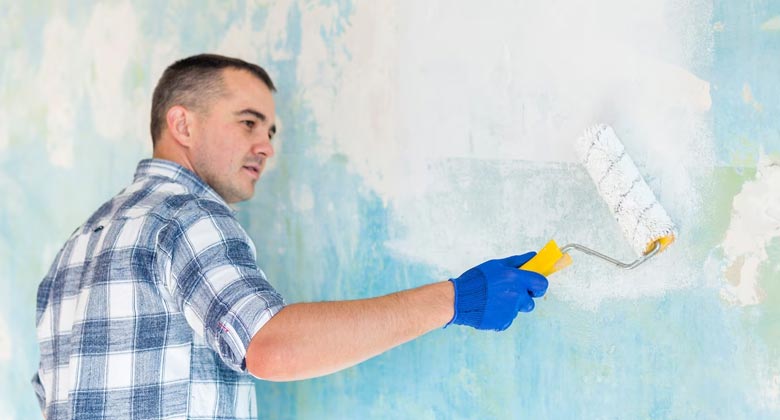
Priming the surface is a crucial step in the drywall preparation process, as it ensures that the paint will adhere well and look smooth once applied. Here are the steps to follow when priming your drywall surface:
Select a primer that is designed specifically for drywall surfaces. Look for a high-quality primer that will provide a smooth, even base for your paint.
Before you start priming, make sure you have all the necessary supplies. You’ll need a paint roller, brush, tray, and primer.
Pour the primer into the paint tray, and apply a paint roller or brush to the drywall surface. Apply the primer in a thin, even layer, and avoid over-applying. Let the primer dry completely before proceeding with the painting process.
After the primer has dried, inspect the surface to ensure it’s smooth and even. If you notice any imperfections, you may need to sand the surface again before painting.
Choosing the right paint is a critical step in preparing drywall for painting. The right paint can ensure a beautiful, long-lasting finish that looks great for years. Here are some steps to help you choose the right paint for your drywall:
The room you are painting can affect the type of paint you choose. Different rooms have different needs. For example, a bathroom or kitchen may require paint resistant to moisture and stains.
There are several types of paint available, including water-based and oil-based paints. Water-based paints are easier to clean up and dry faster, while oil-based paints are more durable and better for high-traffic areas.
The finish of the paint will also affect the look of your walls. Matte finishes are great for hiding imperfections, while glossy finishes are more durable and easier to clean. Satin finishes offer a balance between matte and glossy.
The color you choose can significantly impact the overall look of the room. Consider the mood you want to create, the lighting in the room, and any existing furniture or decor.
Choosing high-quality paints is essential for achieving a beautiful, long-lasting finish. Look for paints with a high-quality pigment, as well as paints that are durable and easy to clean.
If you’re unsure about choosing the right paint for your drywall, consider hiring professional painting contractors in West Hartford, CT. They have the experience and knowledge to recommend the best paint for your specific needs and can ensure that your walls are painted with high-quality, long-lasting paint.
Hiring professional painting contractors in West Hartford, CT, is an excellent idea to ensure a flawless finish for your walls. They have the experience and expertise to prepare your drywall correctly and apply paint with a professional touch.
When hiring painting contractors in West Hartford, CT, research and choose a reputable company with a proven track record of delivering high-quality work. Look for online reviews, ask for referrals from friends and family, and check their website to see their previous work.
Preparing drywall for painting may seem daunting, but it’s essential for achieving a professional-looking finish. By following these steps, you can ensure that your drywall is properly prepared for painting. To ensure your walls look perfect, consider hiring painting contractors in West Hartford, CT, such as West Hartford House Painting Experts. They can handle all aspects of the painting process, from preparation to painting, and leave you with a beautiful, flawless finish. Properly preparing your drywall is the key to a perfect paint job.