
7 Creative Stencil Art Techniques to Elevate Your House Painting in Trumbull, CT
Homeowners in Trumbull, CT, understand the significance of a beautifully painted house. It’s not just about protection; it’s about making a statement. And what better way to make that statement than through the artistry of stencil painting? This article will delve into seven innovative stencil art techniques that can transform your house painting in Trumbull, CT, from mundane to magnificent. These techniques aren’t just for seasoned artists but for anyone looking to infuse creativity and charm into their living spaces.
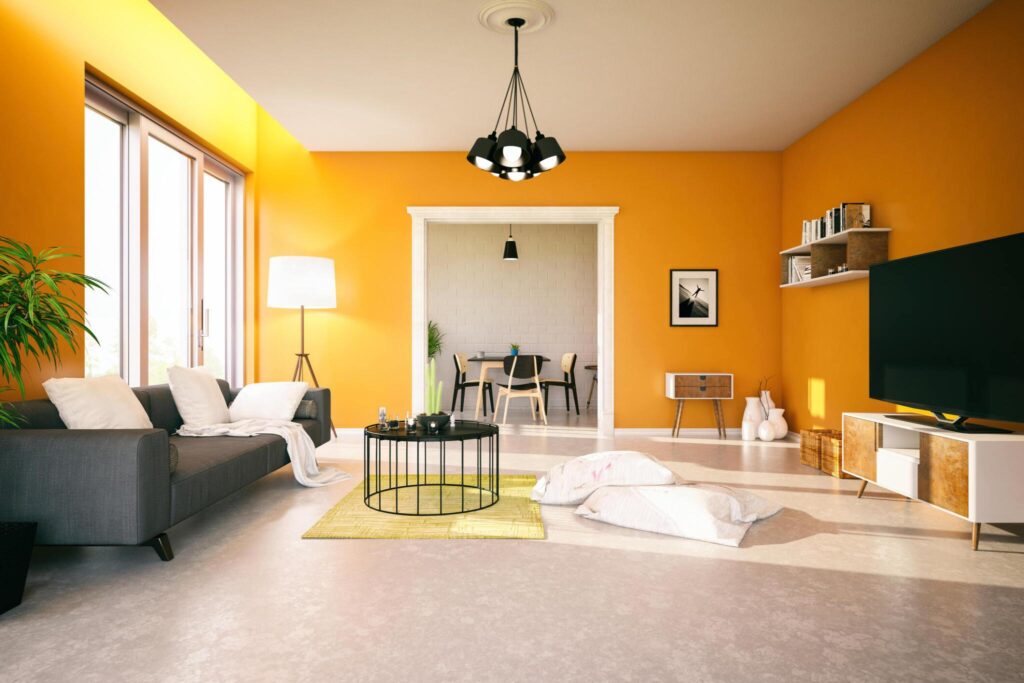
How To Choose the Right Stencil and Paint for Your Interiors
When elevating house painting in Trumbull, CT, basic stencil application is a fantastic starting point. Begin by selecting a stencil design that resonates with your home’s vibe. Opt for patterns that complement your interior decor and architectural style. Once you’ve picked the perfect stencil, choose high-quality paint that ensures vibrant colors and smooth application.
Step-by-Step Stencil Application
STEP 1: Prep the Surface
Ensure your wall is clean, dry, and smooth. A clean canvas guarantees better adhesion and a polished finish for your stencil art.
- STEP 2: Secure the Stencil
Use painter’s tape or a stencil adhesive to hold the stencil firmly in place. This step is vital to prevent any unwanted smudging or shifting during painting. - STEP 3: Apply the Paint
Dip your brush or sponge into the paint, then gently dab off excess paint on a paper towel. The key here is moderation – too much paint can lead to bleed-through. Apply the paint with a light tapping motion, gradually building up the color intensity. - STEP 4: Mind the Edges
For crisp edges, be mindful of the areas where the stencil meets the wall. Hold the stencil down firmly to avoid paint seeping under it. - STEP 5: Peel Off Carefully
Once you’re satisfied with the coverage, slowly peel off the stencil while the paint is still wet. Pull at a 45-degree angle to avoid smudging.
Pro Tips for a Flawless Finish
- TIP 1. Patience Pays Off
Allow the paint to dry completely before repositioning the stencil for the next section. This prevents accidental smudging and ensures clean lines. - TIP 2. Clean Your Stencil
After each use, clean the stencil with mild soap and water to prevent paint buildup that could affect future projects. - TIP 3. Experiment with Colors
Don’t be afraid to experiment with different color combinations. The right hues can bring out the best in your stencil design and complement your house painting in Trumbull, CT.
Common Mistakes to Avoid
- Rushing the Process
Take your time. Rushing through stencil application can lead to sloppy edges and uneven paint coverage. - Overloading with Paint
Too much paint on your brush or sponge can cause paint to seep under the stencil, ruining the clean lines you’re aiming for. - Not Securing the Stencil
Failing to secure the stencil properly can result in smudged or shifted designs. Invest time in taping or using stencil adhesive.
Embrace the Art of Stenciling
Basic stencil application might be just the tip of the iceberg, but it’s an exciting and impactful start to transforming your house painting in Trumbull, CT. The key is practice – don’t be discouraged by initial imperfections. As you master this technique, you’ll gain the confidence to explore more intricate stencil designs, turning your home into a living canvas of artistic expression.

1. Adding Depth and Drama to House Painting in Trumbull, CT
When the goal is to infuse your house painting in Trumbull, CT, with a touch of intrigue, layered stenciling steps up to the plate. This technique involves combining two or more stencil designs to create a multidimensional masterpiece that captivates the eye. It’s a brilliant way to transform walls from mere backgrounds to captivating focal points.
Combining Patterns
Layered stenciling invites you to unleash your creative flair. The magic happens when you select stencils that complement each other. Think floral motifs paired with geometric shapes or intricate swirls intertwined with abstract patterns. The key is to find a balance where each stencil enhances the other without overwhelming the design.
A Step-by-Step Guide to Layered Stenciling
Base Layer
Start with your base layer stencil. This should be the largest and most prominent design. Secure it in place with painter’s tape or adhesive.
- Paint Application
Use a light touch to apply paint, focusing on the open areas of the stencil. Remember, less is more. You can always build up the color intensity gradually. - Let It Dry
Allow the paint to dry completely before moving on to the next layer. Patience is key to achieving clean lines and preventing smudging. - Overlay Stencil
Once the base layer is dry, position the overlay stencil on top. This stencil should be smaller and intricately detailed, creating a harmonious contrast with the base layer. - Paint Application (Again!)
Follow the same gentle painting process for the overlay stencil. Use contrasting or complementary colors to ensure the designs pop. - Peel and Admire
Carefully peel off the overlay stencil while the paint is still wet. The unveiling is like unwrapping a present – you’ll be delighted by the intricate interplay of patterns.
Tips for a Stellar Result
- Visual Hierarchy
Ensure that the base layer remains the focus by choosing a less intricate design for the overlay. This maintains a clear visual hierarchy. - Color Cohesion
While contrasting colors create drama, maintaining a cohesive color palette ensures a harmonious and pleasing look. - Practice Patience
Allow each layer to dry completely before moving on to the next. Rushing can lead to smudging and a less polished finish.
Why Layered Stenciling?
Layered stenciling is an expressive way to transform your house painting in Trumbull, CT, into a gallery-worthy spectacle. It adds depth, complexity, and an artistic touch that turns your walls into a conversation starter. In a town that thrives on individuality, layered stenciling gives your home a distinctive character that echoes the charm of Trumbull itself.
Embrace the Layers
Layered stenciling is more than just a technique; it’s an invitation to experiment, express, and elevate. As you master the art of combining stencil designs, you’ll find yourself not just painting walls but creating stories within your living spaces. Layer by layer, you’ll breathe life into your home, making your house painting in Trumbull, CT, a true work of art.
2. Adding Gradient Glamour to House Painting in Trumbull, CT
In the realm of house painting in Trumbull, CT, ombré stenciling emerges as a captivating technique that adds an elegant gradient effect to your walls. It’s an artful way to infuse your living spaces with a touch of modern sophistication, creating a seamless transition between hues that makes a bold statement.
Ombré Brilliance
Ombré stenciling is all about achieving a gradual color transition from light to dark or vice versa. This technique seamlessly blends colors to create a stunning visual impact that transforms your walls into pieces of art. When applied thoughtfully, ombré stenciling enhances the ambiance of your home and adds a layer of intrigue.
Step-by-Step Guide to Ombré Stenciling
- Select Your Colors
Choose two or more colors that transition smoothly. Think about the overall mood you want to convey – serene, energetic, or sophisticated. - Prep Your Surface
Ensure your wall is clean, dry, and primed for painting. A smooth surface allows for flawless color transitions. - Mark Your Gradient
Divide your wall into sections based on the gradient you envision. You can use light pencil marks as guides to ensure a consistent transition. - Start Painting
Begin with the lightest color at the top of the wall. Use a roller or a large brush to apply the paint. As you move downward, gradually introduce the darker shade. - Blend, Blend, Blend
The magic lies in the blend. Use a dry brush or a blending sponge to gently merge the colors where they meet. This creates a seamless ombré effect. - Stencil Application
Once your ombré background is dry, position your stencil. Choose a design that complements the gradient, enhancing the overall aesthetic. - Stenciling Technique
Apply the stencil as you would for any other technique. The key is to ensure the stencil design doesn’t overpower the ombré background.
Tips for Ombré Success
- Test Colors
Always do a color test on a small area before committing to the entire wall. Lighting and the existing wall color can affect how the ombré effect appears. - Smooth Blending
Take your time blending the colors for a seamless transition. A soft touch ensures a harmonious gradient. - Choose a Simple Stencil
When applying a stencil over an ombré background, opt for a design that doesn’t compete with the gradient. A subtle stencil complements the effect.
Why Choose Ombré Stenciling?
Ombré stenciling is a versatile technique that suits a variety of interior styles. Whether you’re looking to add drama, calmness, or a touch of modernity to your house painting in Trumbull, CT, the ombré effect adapts beautifully.
Embrace the Ombré Elegance
With ombré stenciling, you’re not just painting walls; you’re crafting an atmosphere. The gradual transition of colors adds depth and character to your living spaces. Your house painting in Trumbull, CT, becomes a canvas for creativity, allowing you to infuse each room with your unique style. As you embrace ombré elegance, you’ll watch your home transform into a sanctuary of artful expression
3. Bringing Dimension to House Painting in Trumbull, CT
When it comes to house painting in Trumbull, CT, why settle for flat walls when you can add tactile intrigue through textured stencil art? This technique involves layering textures onto your stenciled designs, creating a visually captivating and touchable masterpiece that elevates the sensory experience of your living spaces.
Texture Play
Textured stencil art introduces a delightful element of touch to your house painting project. By applying texture alongside stencil designs, you infuse depth, personality, and a sense of adventure into your walls. The result? A one-of-a-kind living environment that tantalizes both the eyes and fingertips.
A Step-by-Step Guide to Textured Stencil Art
- Choose Your Texture
There’s a world of textures to explore, from subtle to bold. Textured paints, plaster, or even specialized tools can create effects like stippling, stippling, or rough brushstrokes. - Prep Your Surface
Just like any painting endeavor, a clean and smooth surface is essential. Make sure your wall is clean, dry, and free from any bumps or imperfections. - Stencil Placement
Secure your stencil in place using tape or adhesive, just as you would for regular stenciling. - Texture Application
Apply the chosen texture over the stencil using a palette knife, sponge, or other appropriate tool. Spread it evenly and with purpose, ensuring complete coverage. - Peel Off the Stencil
Carefully remove the stencil while the texture is still wet. This step is crucial to achieving sharp edges and a clean design. - Allow to Dry
Give the texture ample time to dry, as it may take longer than regular paint. Follow the manufacturer’s instructions for drying times. - Finishing Touch
Once the texture is completely dry, you can choose to leave it as is or apply a layer of paint to enhance the texture’s visual appeal.
Tips for Texture Mastery
- Experimentation is Key
Don’t be afraid to try different textures to see what resonates with your home’s aesthetics. Test on a small area before committing to the entire wall. - Subtle vs. Bold
Consider the overall vibe of the room. A subtle texture adds depth without overwhelming, while a bolder texture becomes a focal point. - Keep it Cohesive
Ensure that the texture you choose complements your home’s style. Harmony between texture and design is essential for a polished look.
Why Choose Textured Stencil Art?
Textured stencil art adds a dynamic element to your house painting in Trumbull, CT, turning your walls into an interactive experience. It’s a testament to the power of creativity, offering not only visual aesthetics but also a tactile journey.
Embrace Texture
Texture isn’t just something you see; it’s something you feel. By incorporating textured stencil art, you’re taking your house painting project beyond the ordinary. Your walls become a canvas that invites touch and exploration, making your home a sanctuary of both art and sensation. In Trumbull, CT, where architectural diversity thrives, textured stencil art finds its perfect home, harmonizing modern aesthetics with a touch of tactile charm.
4. Bringing Whimsical Murals to House Painting in Trumbull, CT
Imagine turning your walls into captivating storyboards that celebrate the spirit of Trumbull, CT. With mural-inspired stencils, house painting takes on a whole new dimension, transforming ordinary rooms into extraordinary spaces that reflect your personality and the essence of your community.
From Blank Walls to Breathtaking Murals
Mural-inspired stencils are a gateway to infusing your house painting in Trumbull, CT, with artistic narratives. Whether you’re drawn to the tranquility of nature or the vibrancy of cityscapes, this technique lets you bring your favorite scenes to life on your walls, adding a touch of whimsy and wonder.
A Step-by-Step Guide to Mural-Inspired Stencils
- Choose Your Mural Theme
Decide on a theme that resonates with your vision. It could be anything from sprawling landscapes to intricate patterns – the choice is yours. - Select the Right Stencil
Find a stencil that captures the essence of your chosen theme. This might involve combining multiple stencils to create a complete mural effect. - Prep the Wall
Ensure your wall is smooth and ready for the mural. Repair any imperfections and apply a base coat if necessary. - Stencil Placement
Position the stencil on the wall, securing it in place with tape or adhesive. Make sure it’s aligned correctly for a seamless mural. - Paint Application
Apply the paint using a light tapping or rolling motion. Be cautious not to overload the paint; building up the color gradually ensures better results. - Layering and Detailing
Depending on your chosen mural’s complexity, you might need to layer stencils to add depth and intricate details. Take your time to align and layer accurately. - Finishing Touches
Once you’ve completed the mural, step back and admire your work. Make any necessary touch-ups to ensure the design looks cohesive and polished.
Tips for Mural-Inspired Success
- Reference Real Life
Draw inspiration from the surroundings of Trumbull, CT. Whether it’s local landmarks or nature’s beauty, incorporating familiar elements adds authenticity to your mural. - Planning is Key
Before you start, plan the placement and layout of your stencils. This ensures a harmonious mural that tells a cohesive story. - Layers for Depth
Use layers to your advantage. Adding depth through layering stencils creates a more immersive and visually appealing mural.
Why Choose Mural-Inspired Stencils?
Mural-inspired stencils infuse your house painting in Trumbull, CT, with a touch of enchantment. They allow you to narrate your story, connecting your living spaces with the beauty of nature, the energy of the city, or any other theme that resonates with you.
Embrace Murals
Your home is a canvas waiting to come alive, and mural-inspired stencils offer the paintbrush. Through this technique, you’re not just painting walls; you’re telling stories, sharing dreams, and celebrating the unique charm of Trumbull, CT. With each stroke, your house painting project becomes an artistic journey that transforms your living spaces into extraordinary tales waiting to be explored.

5. Elevating Furniture Aesthetics in Trumbull, CT
House painting in Trumbull, CT, isn’t limited to just walls. Technique 6 introduces an exciting twist – using stencil art to transform furniture. By merging the worlds of interior design and artistic expression, you can turn everyday pieces into stunning works of functional art that seamlessly integrate with your home’s aesthetic.
Furniture as Canvases
Furniture stenciling isn’t just about a fresh coat of paint; it’s about reinventing pieces you already love. This technique allows you to breathe new life into dressers, tables, chairs, and more, transforming them from ordinary objects to artistic focal points that enhance your living spaces.
A Step-by-Step Guide to Furniture Stenciling
- Pick Your Piece
Choose a furniture item that could use a makeover. Whether it’s a worn-out dresser or a neglected coffee table, envision how stencil art can enhance its appearance. - Design Selection
Select stencil designs that complement your furniture’s shape and your home’s overall style. Consider how the design will interact with the piece’s contours. - Prep the Surface
Just like with walls, proper preparation is essential. Sand the furniture to create a smooth surface for paint adhesion. - Prime and Paint
Apply a primer if needed, then paint the furniture in your desired base color. Allow it to dry thoroughly before moving on. - Stencil Application
Position the stencil on the furniture surface and secure it in place. Use painter’s tape or adhesive to prevent shifting. - Paint Application
Use a light touch to apply paint over the stencil. Build up the color gradually to prevent bleeding. - Peel and Admire
Gently peel off the stencil while the paint is still wet. This is the moment of truth – reveal your intricate design. - Protective Finish
Once the paint is dry, apply a clear protective coat to safeguard your stencil art and the underlying furniture.
Tips for Furniture Stenciling Success
- Synergy with Style
Ensure your stencil design aligns with the furniture’s style and the room’s overall aesthetic. Coherence creates a polished look. - Sanding Matters
Properly sanding the furniture ensures smooth paint application. It’s the foundation for a flawless finish. - Experiment with Colors
Don’t shy away from unconventional color choices. A pop of unexpected color can give your furniture a fresh and exciting vibe.
Why Choose Furniture Stenciling?
Furniture stenciling goes beyond aesthetics; it’s a reflection of your personality and creativity. It’s about making your furniture an extension of your home’s design, infusing each piece with your unique touch.
Embrace the Transformation
With furniture stenciling, your house painting in Trumbull, CT, reaches new heights. Each piece becomes a canvas for self-expression, narrating stories and embodying your artistic sensibilities. Through this technique, your home’s interior design transcends traditional boundaries, embracing artful innovation that redefines how furniture interacts with your living spaces.
6. Adding Subtle Elegance to House Painting in Trumbull, CT
House painting in Trumbull, CT, is a canvas of creativity, and Technique 7 brings an element of refined charm – stenciled borders and accents. These subtle yet impactful details add a touch of sophistication to your living spaces, elevating your interiors without overpowering your existing decor.
Borders and Accents
Stenciled borders and accents are like elegant frames that highlight your walls and architectural features. This technique allows you to experiment with patterns, textures, and colors in a way that draws attention without stealing the show. The result? A harmonious fusion of style and subtlety.
A Step-by-Step Guide to Stenciled Borders and Accents
- Choose Your Area
Decide where you want to add the stenciled borders or accents. This could be around doorways, windows, ceilings, or any architectural feature that deserves a touch of flair. - Stencil Selection
Select a stencil design that complements the area’s dimensions and your interior style. Opt for patterns that enhance the architectural elements without overwhelming them. - Prep the Surface
Ensure the surface is clean and ready for stenciling. Clean any dust or debris, and if necessary, apply a fresh coat of paint as the base. - Position the Stencil
Secure the stencil in place using tape or adhesive. Take care to align it correctly for a neat and even pattern. - Paint Application
Using a light touch, apply the paint over the stencil design. Dab off excess paint to prevent bleeding and ensure clean lines. - Peel and Admire
Carefully peel off the stencil while the paint is still wet. This step is essential to maintain the stencil’s sharp edges. - Repeat the Pattern
Depending on the length of the border or the number of accents, repeat the stencil pattern to cover the desired area. - Finishing Touches
Allow the paint to dry completely before stepping back to admire your newly adorned space. Make any touch-ups if needed.
Tips for Border and Accent Success
- Scale Matters
Choose stencil designs that are appropriately scaled for the area you’re working with. A balance between pattern and space is key. - Color Harmony
Ensure that the paint colors you choose for the stenciled borders and accents harmonize with the existing color palette in the room. - Subtle Contrasts
While you want the stenciled elements to stand out, they should do so in a subtle and complementary manner.
Why Choose Stenciled Borders and Accents?
Stenciled borders and accents add a layer of artistry to your house painting in Trumbull, CT, that’s refined and understated. They invite a closer look without overwhelming the senses, creating a delicate balance between decoration and design.
Embrace Subtle Sophistication
In a world of bold statements, stenciled borders and accents offer a refreshing dose of subtlety. These refined details embody the essence of Trumbull, CT, where elegance meets authenticity. By choosing this technique, you’re infusing your house painting project with a touch of sophisticated charm that enhances your living spaces in a nuanced yet impactful way.
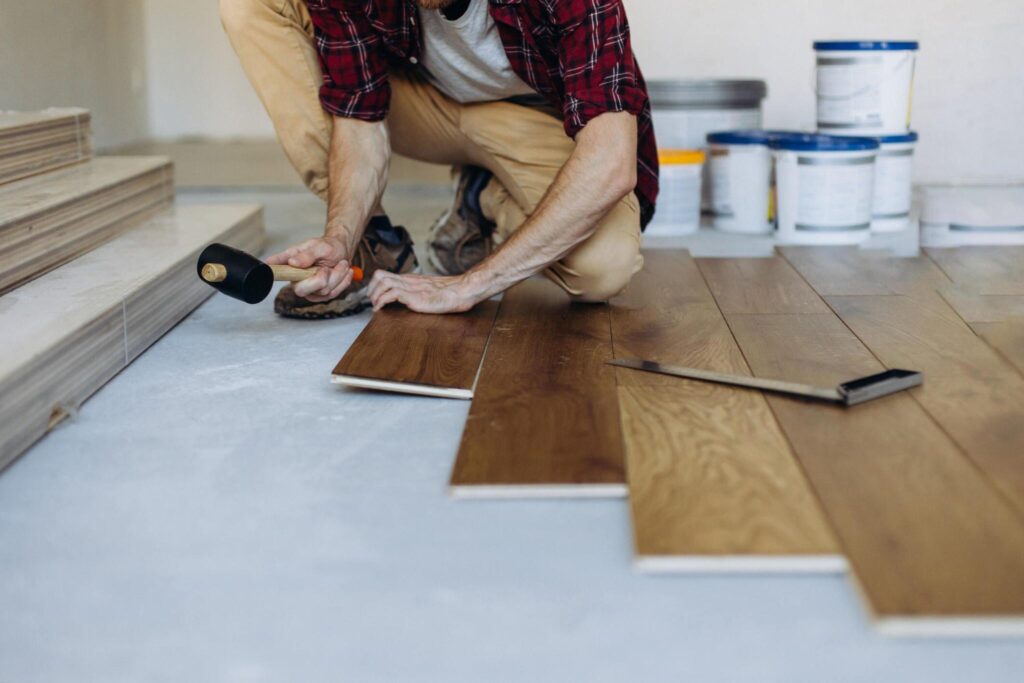
7. Unleashing Creativity on House Floors in Trumbull, CT
When it comes to house painting in Trumbull, CT, the canvas isn’t confined to walls alone. Technique 8 introduces an unexpected twist – stenciled floors. This audacious technique takes your artistic expression to the ground level, transforming floors into captivating works of art that redefine the very concept of underfoot beauty.
Floors as Artistic Canvases
Stenciled floors go beyond rugs and tiles, giving you the power to create stunning visual narratives beneath your feet. It’s a bold way to make a lasting impression on guests and a daily reminder of your creative prowess.
A Step-by-Step Guide to Stenciled Floors
- Select the Area
Choose the area you want to transform. This could be the entryway, a hallway, or any space that deserves a touch of artistic flair. - Stencil Design Choice
Select a stencil design that resonates with the area’s purpose and your overall interior style. Keep in mind that the scale should complement the floor space. - Clean and Prep
Thoroughly clean the floor and ensure it’s free from dust and debris. Sand if needed, and apply a base coat if required. - Stencil Placement
Secure the stencil in place using painter’s tape or adhesive. Ensure it’s properly aligned to create a symmetrical and pleasing pattern. - Paint Application
Apply the paint over the stencil design using a light tapping or rolling motion. Be cautious not to overload the paint to prevent bleeding. - Peel and Admire
Gently peel off the stencil while the paint is still wet. This is the moment where your artistic vision comes to life. - Sealing the Art
Once the paint is dry, apply a clear sealant to protect your stencil art from wear and tear.
Tips for Stenciled Floor Success
- Floor Material Matters
Consider the material of your floor when selecting paint. Choose paints suitable for the floor type to ensure longevity. - Maintenance Plan
Stenciled floors are beautiful but may require occasional touch-ups. Have a plan in place to maintain the vibrancy of your design. - Room Harmony
Ensure the stenciled floor design complements the overall aesthetic of the room. Cohesiveness is key.
Why Choose Stenciled Floors?
Stenciled floors turn house painting in Trumbull, CT, into a bold statement of artistry. They redefine traditional home decor, making every step an experience of creativity and expression.
Embrace Floor Artistry
Stenciled floors don’t just serve as functional surfaces; they’re walking canvases that redefine your living spaces. This technique allows you to make a grand impression while staying true to the charm of Trumbull, CT. By choosing stenciled floors, you’re turning each room into an immersive art gallery, where every step becomes a brushstroke of creativity and imagination.
Ready to Transform Your Home? Try These Stencil Art Techniques Today!
If you’re excited to bring these captivating stencil art techniques to life in your Trumbull, CT, home, look no further than Trumbull House Painter Pros. Our skilled team of painters is ready to help you elevate your house painting game with these innovative methods. Whether you’re dreaming of mural-inspired walls, textured furniture, or stenciled floors, we’re here to turn your vision into a stunning reality. Contact us today to embark on a creative journey that will transform your living spaces into works of art. Contact us today to schedule a consultation!