Google Reviews

Free Estimates Here

Ever Wonder How the Pros Do It? Steps to Painting a Room

Ever Wonder How the Pros Do It? Steps to Painting a Room

Table of Contents

Key Takeaways

✔ Professional painters follow a proven process to ensure smooth, lasting results.

✔ Proper prep work is the foundation of every successful paint job.

✔ Choosing the right tools and finishes is essential to achieving clean lines.

✔ Cutting in and rolling techniques can make or break a paint job.

✔ Pros select paint colors based on lighting, fixed elements, and flow.

✔ Maintaining painted walls helps preserve color, texture, and finish over time.

✔ Working with experts ensures every step is done with precision and care.

Ever walked into a freshly painted room and wondered how every line looks razor-sharp, every wall evenly coated, and not a single drip in sight? That kind of finish doesn’t happen by chance—it’s the result of experience, precision, and a process that the pros follow without fail. Westport painters have mastered the art by sticking to a clear system that prioritizes prep, technique, and timing. 

Here are five essential steps to painting a room the way professionals do it.

How Westport Painters Tackle Every Room

How Westport Painters Tackle Every Room

1. Prep the Room for Success

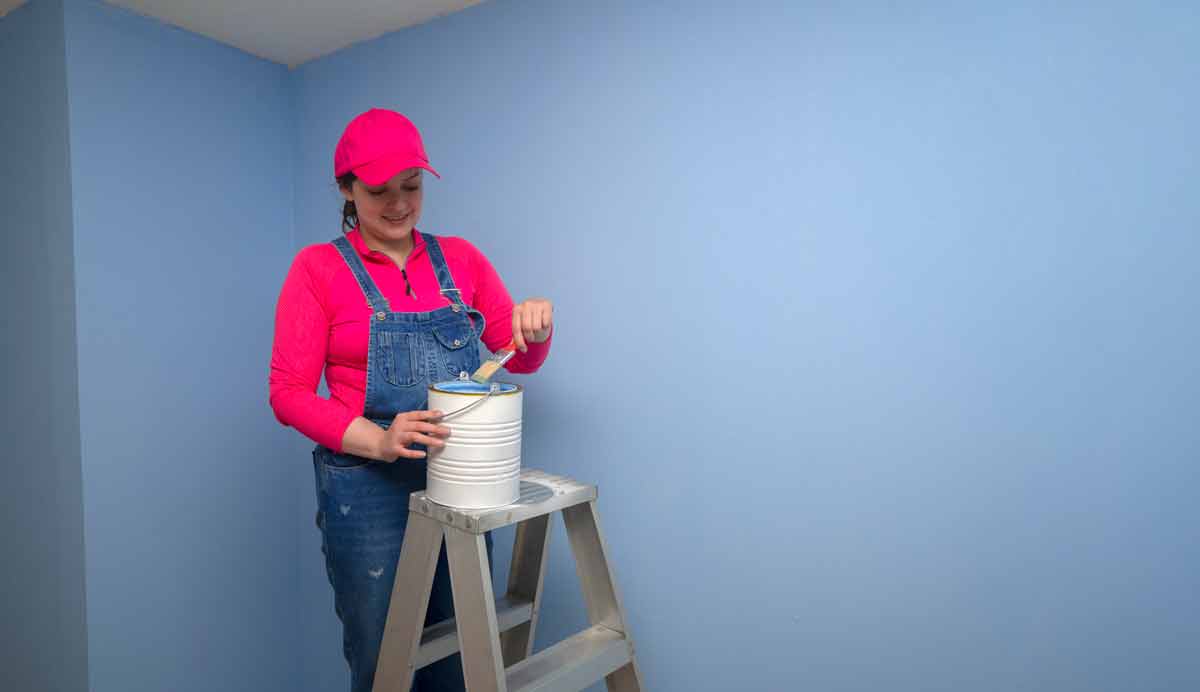
Every professional painter knows that a flawless finish starts long before the first brushstroke. Prepping the room might not be the most exciting part, but it’s what sets the stage for everything that follows. In fact, skipping this first step can derail even the most detailed interior painting guide.

How Pros Get the Space Ready Before Painting

  • Clear and Cover Everything: Pros start by removing as much furniture as possible from the room. What can’t be moved gets covered with thick plastic sheeting or canvas drop cloths to protect against splatters and dust.
  • Tape Off with Purpose: Clean, sharp lines begin with quality painter’s tape applied to baseboards, trim, light switches, and outlets. Westport painters press the tape down firmly to prevent bleeding and ensure they can apply painting techniques for clean lines effectively.
  • Inspect and Repair the Walls: Professionals take time to inspect the walls under good lighting, marking every dent, hole, or rough patch. They fill imperfections with spackle, sand the surface smooth, and wipe it clean—an often overlooked but essential part of the steps to painting a room.

2. Prime and Patch with Intention

Once the space is prepped, painters turn their attention to the condition of the walls. This is where real professionals make a big difference—by creating the perfect foundation for a flawless finish. In every solid interior painting guide, this step ensures color goes on smooth and stays vibrant.

How Pro Painters Prime and Patch Each Project

  • Prime Problem Areas First: Instead of priming the entire wall right away, professionals target problem areas like patched spots, water stains, or previously unpainted surfaces. These spots get a coat of primer to prevent uneven absorption and to keep paint from flashing or looking blotchy.
  • Choose the Right Primer for the Job: Not all primers are created equal—some block stains, others seal porous drywall, and a few help paint stick to glossy surfaces. Westport painters select the right type based on the wall’s condition and the paint finish being used, a core part of best practices for interior painting.
  • Sand Between Coats for a Smooth Base: After primer dries, a light sanding removes any raised edges or roller lint. This gives the paint a clean surface to grip, which is crucial in the steps to painting a room like a pro.

3. Cut In Like a Craftsman

Cutting in separates amateurs from experts. It’s the careful detailing around ceilings, corners, trim, and fixtures—done with precision to frame the room before rollers come into play. It’s also where painting techniques for clean lines really start to show.

How the Pros Define Room Edges

  • Use the Right Brush for Precision: A high-quality angled sash brush gives painters the control they need to edge perfectly along baseboards and moldings. The angled bristles allow for better reach and smoother coverage, even in tight corners.
  • Load the Brush Correctly: Too much paint causes drips, while too little leaves streaks. Pros dip the brush about a third of the way into the paint, tap off the excess—not wipe it—and keep a steady hand to deliver sharp lines without flooding edges.
  • Steady Hands and Smart Movements: Instead of rushing, painters keep a slow and steady pace when cutting in. They guide the brush using their whole arm, not just the wrist, which helps avoid shakiness and supports painting a room step by step with control.

4. Roll with Rhythm and Consistency

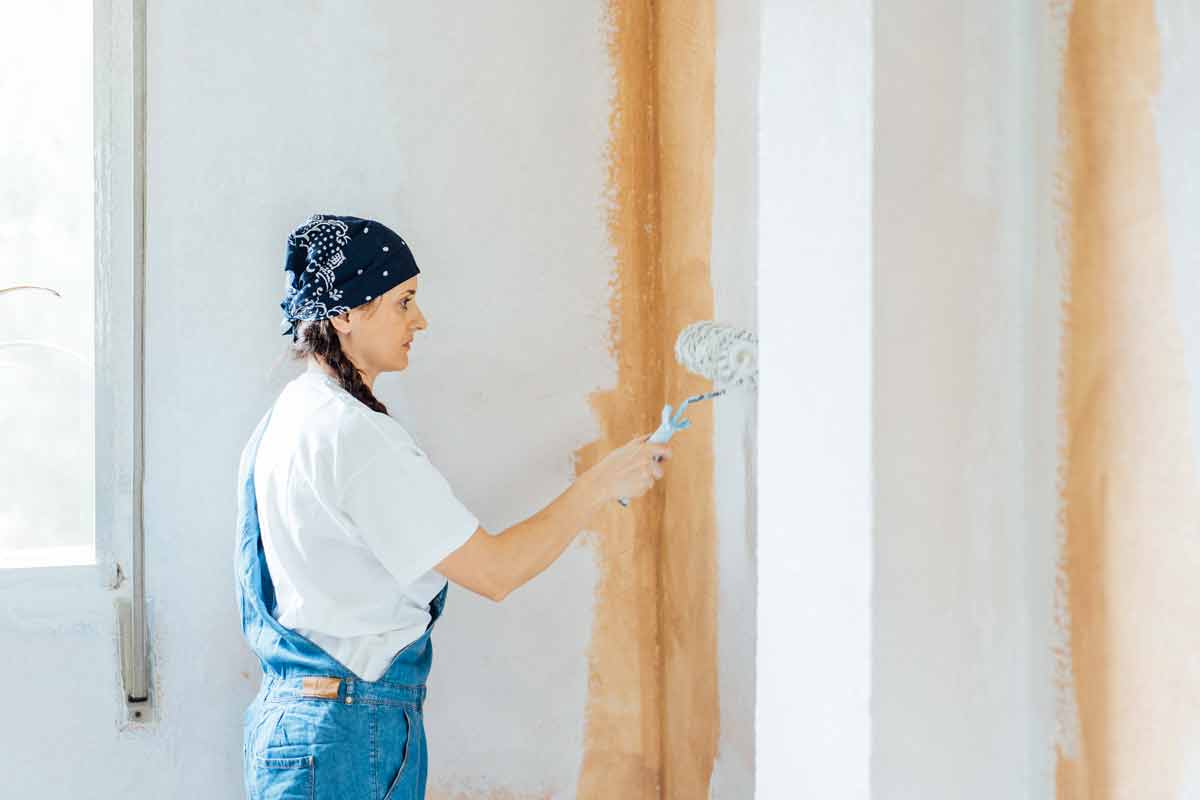
Once the cutting is done, it’s time to bring out the roller. This step covers the majority of the wall and demands smooth, even application to avoid streaks or roller marks. It’s one of the most visible parts of painting a room step by step and can make or break the final look.

How Professionals Roll Walls with Efficiency

  • Follow a Consistent Pattern: Painters use a W or M pattern when rolling paint onto the wall. This spreads the paint evenly across the surface before filling in the gaps with parallel strokes, keeping the wall looking uniform and polished.
  • Keep a Wet Edge to Avoid Lines: To prevent lap marks, pros work in sections and avoid letting the paint dry between strokes. They blend each new section into the last while the paint is still wet—a key move in the best practices for interior painting.
  • Reload the Roller Regularly: Dry rollers leave patchy spots. Westport painters dip the roller frequently, rolling it on the tray to evenly distribute the paint, which keeps coverage consistent and supports smooth, professional results.

5. Touch Up and Clean Up with Care

Even after the painting is “done,” the pros know there’s still work to do. The final stage is all about attention to detail—touching up missed spots, removing tape cleanly, and making sure the room looks as good as new. These final touches tie together the entire interior painting guide.

Final Touches That Professionals Do

  • Inspect from Multiple Angles: Light hits walls differently depending on the time of day and room angle. Painters examine their work under various lighting to catch thin spots, drips, or uneven textures—making this an unskippable part of the steps to painting a room.
  • Peel Tape at the Right Time: Timing matters when removing painter’s tape. Professionals peel it off at a 45-degree angle while the paint is still slightly tacky to prevent tearing or pulling paint away from the wall, an essential skill for achieving painting techniques for clean lines
  • Leave No Mess Behind: The job isn’t finished until everything is clean. Brushes and rollers get washed thoroughly or disposed of properly, and painters return furniture to its place, leaving the space spotless and reflecting the true best practices for interior painting.

How to Choose the Right Paint Finish for Each Room

Choosing the right paint finish is just as important as selecting the perfect color, as the wrong one can highlight flaws, attract dust, or wear quickly in busy areas. Strategic choices pay off too; for instance, using gray in the living room or bedroom has outperformed pale neutrals, potentially increasing offers by at least $1,755.

That’s why professional painters—like those in Westport—consider lighting, durability, and surface texture to ensure lasting results that align with best practices for interior painting. 

1. Flat Finish for Ceilings and Low-Traffic Areas

Flat or matte paint offers a smooth, non-reflective surface that hides minor flaws better than any other finish. It’s ideal for ceilings, adult bedrooms, and formal dining rooms where there’s less risk of scuffs or moisture. Pros often begin their interior painting guide by recommending flat finishes in spaces where durability isn’t the top concern.

2. Eggshell Finish for Living Rooms and Hallways

Eggshell has a soft, velvety sheen that balances appearance with light washability. It works well in moderately used areas like living rooms, hallways, and entryways, giving walls a gentle glow without making imperfections stand out. For homeowners following the steps to painting a room, eggshell offers a practical yet polished option.

3. Satin Finish for Kitchens and Kid’s Rooms

Satin paint is durable, easy to clean, and slightly more reflective than eggshell—making it perfect for high-touch areas. Professionals often use it in kitchens, bathrooms, and children’s bedrooms because it holds up well to moisture and messes. As part of any interior painting guide, satin delivers a durable finish that still looks refined.

4. Semi-Gloss Finish for Trim, Doors, and Cabinets

Semi-gloss has a noticeable shine that enhances architectural details like trim, doors, and cabinetry. It’s highly durable and easy to scrub, making it ideal for surfaces that see frequent contact. To follow the painting techniques for clean lines, pros use semi-gloss to create crisp contrasts between walls and moldings.

5. Gloss Finish for Statement Pieces or Modern Looks

Gloss paint offers a mirror-like shine and is often reserved for accent walls, furniture, or bold modern designs. It’s unforgiving on uneven surfaces, so professionals take extra care during prep to ensure a flawless base. This high-sheen finish is best left to skilled painters familiar with each step to painting a room properly.

6. Low-VOC and Specialty Finishes for Sensitive Spaces

For nurseries, healthcare settings, or eco-conscious homes, low-VOC (volatile organic compounds) and specialty finishes are the go-to. These paints reduce odors and toxins while still delivering solid coverage and durability. Westport painters include these options in their best practices for interior painting, especially when air quality and safety are a top priority.

How Professionals Select Colors That Work in Real Life

With the global house painting services market projected to reach $29.6 billion by 2033, it’s clear that homeowners are investing more than ever in getting it right. Color selection, for example, goes far beyond picking a swatch that looks good under showroom lighting—what seems perfect in-store can appear entirely different at home. 

That’s why professional painters draw on experience, environmental factors, and a comprehensive interior painting guide to ensure each shade works beautifully in real-life settings.

1. Consider Natural and Artificial Lighting

Professionals start by evaluating how sunlight and indoor lighting affect color tones throughout the day. A soft gray may look fresh in daylight but take on a blue hue under warm bulbs. This step is essential in the steps to painting a room, helping clients avoid unexpected color shifts after the job is done.

2. Test Large Samples on the Wall

Instead of relying on tiny paint chips, pros apply large sample patches directly to the walls. They observe how the color behaves in different corners and during various times of day. This real-world approach reflects the best practices for interior painting and helps narrow down options with confidence.

3. Account for Fixed Elements in the Room

Experienced painters always look at flooring, countertops, cabinetry, and furnishings before recommending colors. A creamy white might clash with cool-toned tiles or wood with red undertones. Matching paint to fixed elements is a key detail in the interior painting guide that prevents costly do-overs.

4. Balance Bold and Neutral Choices

Professionals guide homeowners on when to go bold and when to stay neutral—depending on room function, size, and style goals. A navy accent wall might work in a study but overwhelm a small hallway. By following the steps to painting a room and balancing tones, pros create harmony that feels intentional.

5. Plan for Flow Between Rooms

Pro painters think beyond one room and consider how colors will transition throughout the home. Smooth transitions in open-concept layouts or adjacent spaces maintain cohesion and avoid visual disconnection. Seamless flow is often overlooked but essential in any thorough interior painting guide.

6. Understand Undertones and Color Temperatures

Trained eyes pick up on subtle undertones—green, pink, blue—that can clash with other surfaces if missed. A beige with yellow undertones may not pair well with a cooler gray trim. Westport painters use their understanding of color theory to align shades with the painting techniques for clean lines and polished finishes.
maintain-room

How to Maintain a Professionally Painted Room Over Time

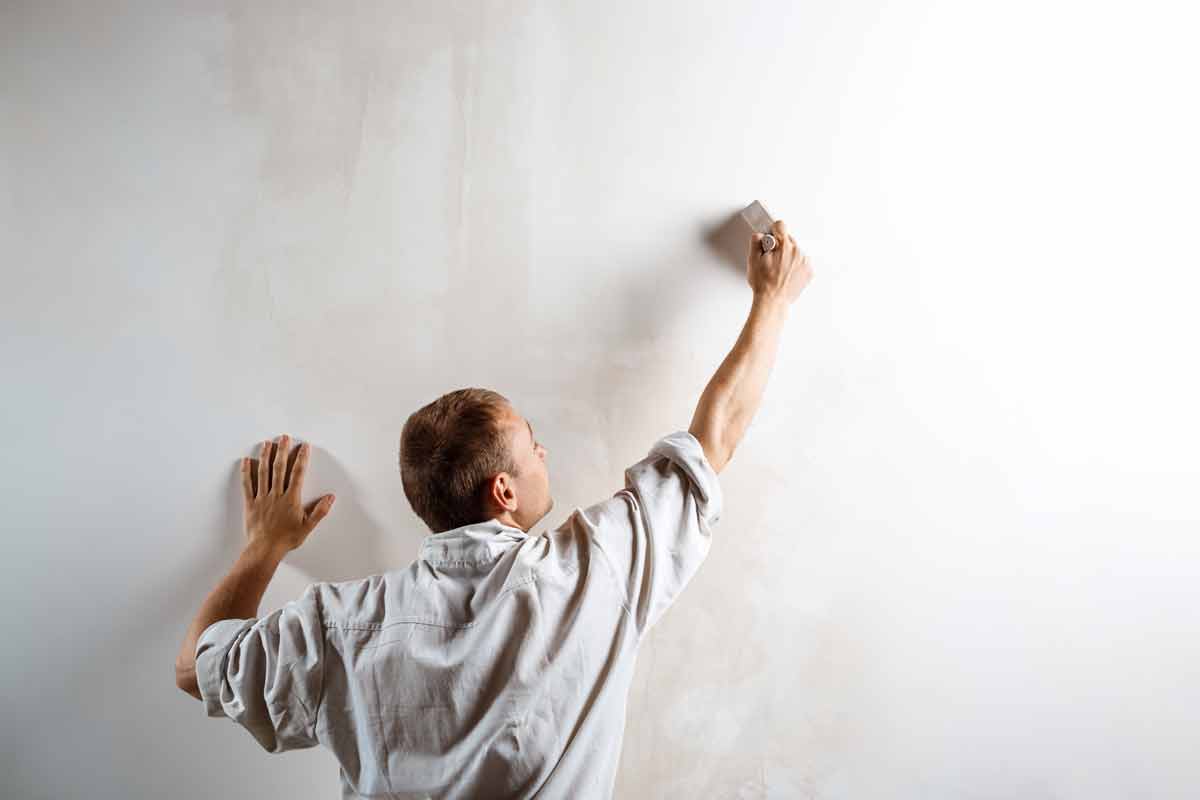
A beautiful paint job doesn’t just stop at the final coat—how it’s maintained can add years to its life. Even the most flawless finish can fade, crack, or stain if it’s not cared for properly. Professional painters in Westport, CT, build maintenance advice into their interior painting guide, helping clients protect their investment long after the brushes are cleaned.

1. Dust and Wipe Walls Regularly

Over time, dust, pet dander, and fingerprints collect on painted surfaces, especially in high-traffic areas. Using a soft microfiber cloth or sponge with mild soap keeps walls clean without damaging the finish. This simple habit supports the best practices for interior painting by preserving the original look and feel of the color.

2. Spot Clean Stains Before They Set In

Smudges and spills should be gently cleaned as soon as they appear to avoid permanent marks. Professionals recommend satin or semi-gloss finishes in active rooms because they hold up better to spot cleaning. Following this tip is part of maintaining long-lasting paint quality.

3. Use Gentle Cleaners and Soft Tools

Harsh chemicals and abrasive scrubbers can strip paint or dull the finish, even if the walls are washable. Painters suggest using diluted dish soap, warm water, and soft sponges or cloths. Keeping the surface intact is critical in protecting the work that followed a detailed process.

4. Touch Up Small Nicks with Leftover Paint

Even careful households experience small chips or dings over time. Professionals always leave extra labeled paint so homeowners—or their crew—can touch up problem spots quickly. Having the right color and finish on hand ensures any fixes match perfectly and maintain the painting techniques for clean lines used from the start.

5. Monitor Moisture in Bathrooms and Kitchens

Humidity is a silent paint killer, leading to peeling, mildew, or bubbling over time. Using exhaust fans regularly and choosing mold-resistant paints are part of the best practices for interior painting in wet areas. Professionals factor in these details during paint selection and client walk-throughs.

6. Know When It’s Time to Repaint

Even the best-maintained rooms will eventually need a refresh—typically every 5 to 7 years, depending on use and exposure. Fading, discoloration, or frequent touch-ups are signs it’s time for a new coat. Westport painters help clients plan ahead by reviewing the original interior painting guide and suggesting next steps based on the room’s wear.

Frequently Asked Questions (FAQs)

Primer is a preparatory coating that helps paint adhere better to surfaces and provides a uniform base for color. Paint, on the other hand, contains pigment and binders that add color and finish. Including primer as part of the steps to painting a room is key to achieving smooth, long-lasting results.

When working with wallpaper, most pros remove it entirely before painting to avoid bubbling or peeling. For textured walls, they often use specialty rollers and follow specific painting techniques for clean lines that account for the uneven surface. These details aren’t always in a basic interior painting guide but are second nature to experienced painters.

Interior paint isn’t made to withstand outdoor elements like UV rays, moisture, or temperature changes. Using it outside leads to fading, peeling, or mildew issues. The best practices for interior painting clearly recommend using the right product for the job to ensure durability and safety.

Professional painters are trained to test for and safely manage lead-based paint found in homes built before 1978. This includes containment, specialized cleanup, and disposal practices that follow EPA guidelines. While not part of everyday steps to painting a room, handling lead paint requires a trained and licensed expert.

Professionals store extra paint in airtight containers, labeled with the room name, paint brand, color code, and finish. They keep it in a cool, dry place away from direct sunlight to extend its shelf life. This helps with future painting a room step by step touch-ups without guessing or mismatching the original color.

Bring Color to Life with Westport Professional House Painters!

Ready for walls that look sharp, feel smooth, and last for years? Westport Professional House Painters bring expertise, care, and precision to every project, from start to final brushstroke. Whether it’s refreshing a living room or updating a whole home, our crew in Westport, CT, follows proven steps to painting a room and uses trusted interior painting guide methods to get it right the first time. 

Connect with us today