
Yes, you usually need to sand when repainting kitchen cabinets, at least a light scuff-sand, to help primer and paint bond and hold up to daily use. That matters more now because cabinet upgrades are a go-to “big impact, lower disruption” project as homeowners try to stretch renovation budgets.
In the 2025 U.S. Houzz Kitchen Trends Study, paint was the most common finish for new cabinet materials (57%) among homeowners adding or replacing cabinets as part of kitchen renovations planned or completed in 2024–25, far ahead of stain (17%) and wood veneer (7%).
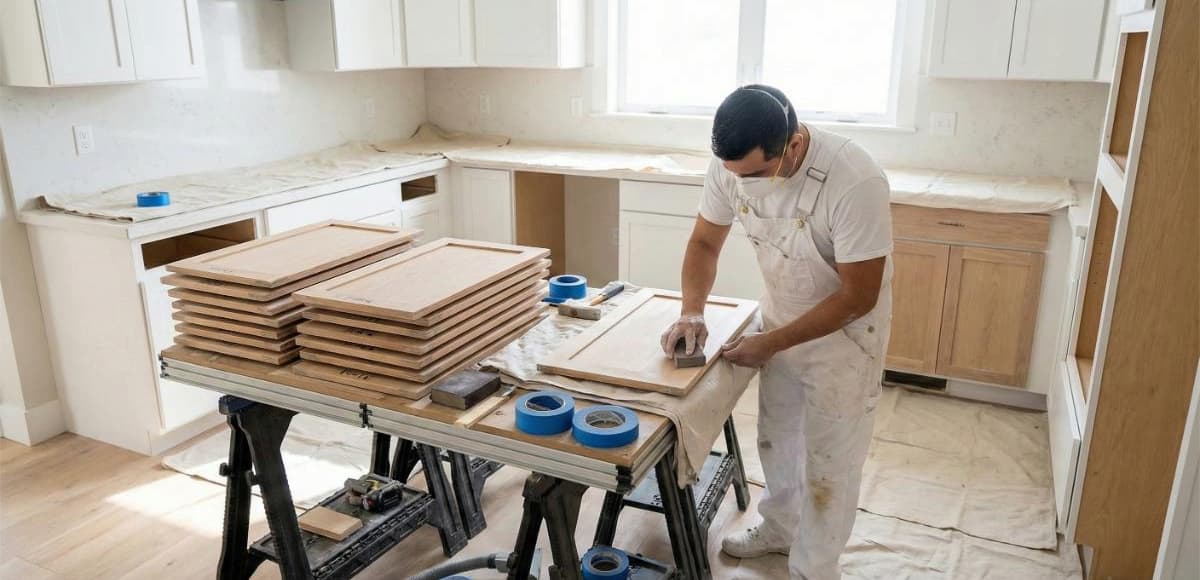
If you are searching for house painters near me or planning to DIY, sanding is the step that separates a finish that looks good for a month from one that lasts for years.
Key Takeaways
|
Most of the time, yes. If you want to paint kitchen cabinets and have the coating resist peeling, chipping, and greasy fingerprints, you need to dull the existing finish so the primer can grip. That usually means sanding cabinets lightly, not aggressively stripping them down.
You can sometimes skip traditional sanding if the cabinets are already painted and in great condition, and you use the right bonding primer after thorough cleaning. Even then, most pros still do a light scuff-sand because it is fast insurance against adhesion failures.
Sanding creates microscopic scratches that give primer “tooth.” It also removes small surface contaminants that cleaners can miss, such as embedded cooking oils around handles and drawer pulls. On glossy factory finishes, that slick surface is the enemy of adhesion. A quick scuff makes your primer behave like it is supposed to.
Skipping prep often looks fine at first, then problems show up where hands touch the most.

Choosing what grit of sandpaper for cabinets depends on what you are sanding and why.
Hand sanding is safer for profiles, edges, and door details because it is harder to gouge the surface. Power sanding is faster on flat door panels and large cabinet sides, but it is easy to burn through corners or leave swirl marks if you push too hard. If you use a sander, use light pressure and finish with a quick hand pass to catch missed glossy spots.

Take off doors, drawers, hinges, and pulls. Label each door and hinge location so everything goes back where it came from. Put screws in labeled bags.
Degrease first. Sanding over grease just smears it into the surface and clogs the sandpaper.
Scuff-sand all faces that will be primed and painted: door fronts and backs, drawer fronts, face frames, and exposed sides.
Remove dust with a vacuum and a tack cloth or a damp microfiber cloth (lightly damp, not wet). Check under strong light for shiny patches. If you see gloss, sand that spot again. Dust left behind can cause rough paint and poor bonding.
Painting cabinets white is less forgiving than darker colors because shadows and surface texture show up faster. Focus on smoothness and stain control.
If your cabinets are oak with deep grain and you want a “sleek white” look, understand that paint often telegraphs grain unless you grain-fill. That is not required for durability, but it is a common expectation with white cabinet finishes.

Sanding and deglossers both aim to solve the same problem: helping primer and paint grip a surface that is too slick. The better choice depends on what your cabinets are made of, what finish is on them now, and how perfect you need the final result to look.
Sanding is the most dependable way to prep because it physically changes the surface. A light scuff-sand removes shine, knocks down minor bumps, and gives primer something to bite into.
A deglosser (often called liquid sandpaper) chemically dulls the finish. It can be helpful on doors with ornate profiles, corners, and areas where sanding is awkward.
For many cabinet repaint projects, the most consistent method is a combination: degrease first, use a deglosser on detailed areas, then scuff-sand flat and high-touch zones with 180–220 grit. That keeps prep manageable while reducing the risk of peeling around handles, edges, and frequently opened doors.

Usually, yes. Primer helps, but it cannot reliably bond to a greasy or glossy surface. A light scuff-sand plus a bonding primer is the safer combination.
Use 180–220 grit for most cabinet doors and boxes. It is aggressive enough to dull gloss without leaving deep scratches.
Sometimes, if the existing paint is in excellent shape, and you clean well. In practice, most painters still scuff-sand because it reduces the risk of peeling on high-touch areas.
These surfaces are tricky. You often need more than sanding, such as specialized bonding primers and careful surface prep. If the finish is slick and flexible, the risk of failure is higher than on wood.
White highlights texture, seams, and sanding inconsistencies. Prep, stain-blocking primer where needed, and light sanding between coats make a bigger difference.
Cabinet repainting looks straightforward, but prep is where most DIY projects stumble. If you want a durable finish without the trial-and-error, Trumbull House Painter Pros can evaluate your cabinet material, existing finish, and the right prep plan, including whether sanding, deglossing, or both makes sense. For homeowners and property owners in Trumbull, CT, a professional cabinet painting approach can save time, reduce mess, and deliver a smoother result that holds up to daily kitchen use.