Hiring a Pro for Wood Exteriors Painting? Here’s What to Expect for Trim and Fascia
Table of Contents
Key Takeaways
✔ A thorough inspection and prep process ensures the wood is clean, smooth, and ready for long-lasting paint adhesion.
✔ Professionals help select durable paint or stain options that match the home’s style and protect exterior wood surfaces.
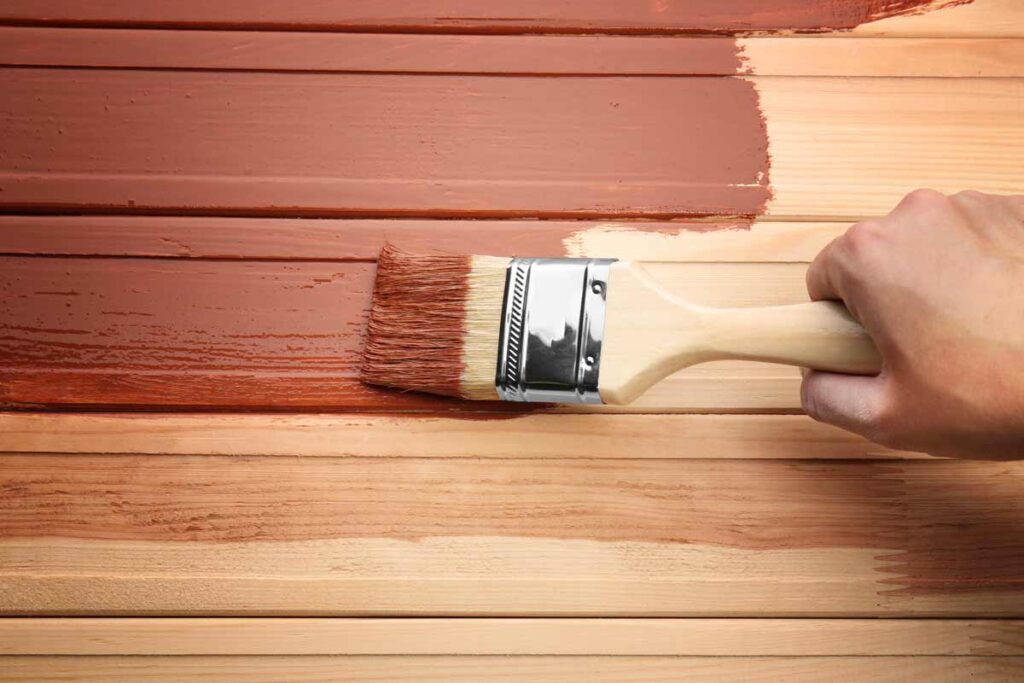
✔ The team applies primer and paint with care, using proper techniques to achieve an even, weather-resistant finish.
✔ The project ends with a detailed review, touch-ups if needed, and full cleanup, leaving the home exterior neat and polished.
Freshening up a home’s exterior with professionally painted trim and fascia not only improves curb appeal but also protects the structure from long-term weather damage. Whether it’s minor touch-ups or full wood exterior painting, skilled pros understand how to handle prep, materials, and finishing with precision. Quality work doesn’t just enhance appearance—it also adds measurable value.
In fact, a recent HomeLight survey of 1,000 real estate agents found that painting a home’s exterior can increase resale value by more than $7,500, delivering a 152% return on investment.
4 Things to Expect When Hiring Pros for Trim and Fascia
1. Assessment and Preparation
Before starting any wood exterior painting project, a detailed assessment and surface preparation are essential. This ensures that the final finish is durable, smooth, and capable of withstanding harsh outdoor elements.
Inspecting the Current Condition
The first step in professional wood house painting is evaluating the overall state of the trim and fascia
Check for Peeling or Cracked Paint: Areas with peeling paint indicate the existing finish is deteriorating and must be removed to avoid poor adhesion. This is common in older homes and highlights where extra attention is needed during exterior wood painting services.
Look for Signs of Rot or Mold: Soft or darkened areas of wood suggest water damage or fungal growth, which will compromise both appearance and longevity. These spots must be addressed before applying any new paint or stain.
Evaluate Structural Stability: Trim or fascia that is warped, loose, or sagging must be stabilized or replaced before painting. This step ensures the wood can support the demands of a quality weatherproof wood painting finish.
Cleaning and Surface Preparation
Effective prep is the foundation of any long-lasting wood exterior painting project.
Power Wash to Remove Dirt and Debris: Pressure washing clears away layers of grime, mildew, and chalky residue that can prevent paint from bonding. This process exposes the raw condition of the wood for better evaluation.
Scrape Off Loose Paint: Any chipped or bubbling paint is scraped off to create a flat surface that accepts new paint smoothly. This prevents future flaking and improves the appearance of the final coat.
Sand Rough or Glossy Areas: Sanding helps smooth out uneven patches and scuffs up shiny spots so the primer and paint grip well. This is especially important when switching from older finishes to updated professional wood house painting systems.
Repairing or Replacing Damaged Trim and Fascia
Strong, dry wood is essential for quality exterior wood painting services and to support long-term durability.
Replace Rotted Trim or Fascia Boards: Wood that is soft, crumbling, or beyond repair is removed and replaced with treated lumber. This ensures the structure is sound and ready for long-lasting paint or staining vs. painting exterior wood treatments.
Seal Gaps and Cracks with Caulk: Caulking around seams and joints helps prevent water intrusion, which leads to rot and peeling over time. It also gives the finished paint job a cleaner, more seamless appearance.
Prime Bare Wood or Repairs: Bare spots and repaired wood are coated with primer to protect against moisture and improve paint adhesion. A primer is a thicker, protective base layer that blocks water, pollutants, and other elements—making it a critical part of any weatherproof wood painting process for long-lasting results.
Treat Exposed Wood: Any unpainted or sanded-down wood is sealed with a protective barrier that resists moisture and decay. This treatment step is essential for homes in wet or humid climates where professional wood house painting must last longer.
2. Material and Color Selection
Choosing the right materials and colors is essential for a long-lasting and attractive wood exterior. Professionals offering exterior wood painting services often help homeowners make informed decisions that not only improve curb appeal but also protect against weather damage and wood deterioration.
Recommendations for Durable Paints and Primers
Before applying any color, professionals begin with selecting products designed to last. The right primer and paint ensure the finish sticks well, resists peeling, and withstands seasonal changes—elements that are crucial for a successful wood exterior painting project.
Oil-Based Primers: Ideal for aged or previously painted wood; they offer deep penetration and excellent sealing. These primers are especially useful in exterior wood trim and fascia painting, where wood often has imperfections or wear.
Latex-Based Primers: Great for new wood and eco-conscious projects; they are quick-drying and low in VOCs (volatile organic compounds). This type of primer is often used in professional wood house painting projects for its flexibility and ease of cleanup.
Stain-Blocking Primers: Useful for wood with discoloration or sap issues; these prevent stains from bleeding through the topcoat. In weatherproof wood painting, these primers help protect against moisture damage and mold growth.
100% Acrylic Exterior Paint: Known for flexibility and adhesion; excellent for wood exterior painting that faces sun and rain. It resists cracking and fading, making it a go-to choice for long-term durability.
Elastomeric Paints: Thick and elastic; good for sealing minor cracks and providing an extra layer of defense in weatherproof wood painting. These paints are ideal in extreme climates and help extend the life of the exterior.
Solid-Color Stains: Often used in staining vs. painting exterior wood discussions; they offer a painted look with stain-like absorption. They are easier to maintain over time and still allow some of the wood’s texture to show.
Choosing Complementary or Standout Colors for Trim and Fascia
Color choice plays a big role in defining a home’s style. Professionals often suggest color schemes that harmonize with the overall architecture and setting.
Classic White or Off-White: A timeless trim choice that brightens and frames any wood tone. This is especially popular in professional wood house painting to create clean, crisp contrast against darker siding.
Bold Contrasts (e.g., Black on Natural Wood): Creates a sharp, modern edge ideal for rustic or contemporary homes. This bold choice can emphasize architectural lines in wood exterior painting projects.
Earth Tones: Browns, taupes, and greens that blend beautifully with natural wood for a cohesive look. These shades complement the organic textures used in many exterior wood painting services.
Monochrome Palettes: Slight variations of the main exterior color; subtle and sophisticated, often used in upscale professional wood house painting projects. This approach offers a seamless, modern finish without harsh contrast.
Professional Guidance on Finishes and Longevity
Experienced painters not only apply the right products but also help homeowners understand which finishes are best for both style and durability. Finish type affects appearance, lifespan, and maintenance needs.
Flat or Matte Finish: Offers a soft look but may attract dirt; suitable for minimal-sheen aesthetics. It is less commonly used in exterior wood painting due to its lower resistance to moisture and fading.
Satin Finish: Popular for exterior wood trim and fascia painting; balances smoothness with easy cleaning. This finish hides imperfections while offering enough sheen to repel dirt and water.
Semi-Gloss Finish: Reflects more light and repels moisture, making it ideal for fascia boards and detailed trim. It is often recommended in weatherproof wood painting for its enhanced durability.
Gloss Finish: Highly reflective and durable, best for decorative or high-impact areas but can highlight surface flaws. This finish is occasionally used in wood exterior painting to add shine and depth to entryways or shutters.
3. The Painting Process
Exterior wood trim and fascia painting is a vital part of preserving the structure and appearance of any home. Through each phase—preparation, priming, painting, and curing—professional wood house painting teams ensure lasting, quality results.
Taping and Protecting Nearby Surfaces
Before starting any wood exterior painting, painters carefully cover areas that should not be painted. This includes using drop cloths, painter’s tape, and plastic sheeting to shield siding, windows, and doors from overspray and drips.
Cover Windows and Doors: Windows, doors, and other entry points are wrapped or masked to prevent paint damage and ensure clean, sharp lines along the trim. This preparation step helps maintain a tidy look and is especially important for detailed exterior wood painting services.
Protect Landscaping and Fixtures: Shrubs, flower beds, outdoor lights, and hardware are all protected with tarps or shields before painting begins. This avoids staining plants and ensures the home’s exterior remains neat and undisturbed.
Secure Edges and Seams: Painters carefully apply tape at the borders of trim and fascia to produce defined edges and professional results. Taping seams and corners ensures the exterior wood trim and fascia painting looks clean and intentional.
Applying Paint in Multiple Coats for Durability
Multiple coats are standard in exterior wood painting services to improve resistance to fading, peeling, and weather damage. Applying layers correctly ensures a strong, even finish that protects the trim and fascia for years.
First Coat for Coverage: The initial coat creates a uniform base color and starts building the paint film that will protect the wood underneath. This step also reveals any missed repairs that can be corrected before the next coat.
Second Coat for Protection: A second application adds thickness and durability, forming a stronger barrier against rain, sun, and temperature changes. For weatherproof wood painting, this second layer is critical in extending the lifespan of the finish.
Drying and Curing Times
Drying and curing times are often misunderstood but play a major role in the durability of wood exterior painting work. Even if paint feels dry to the touch, it needs time to fully cure and form a tough, weather-resistant surface.
Follow Dry-To-Touch Time: Depending on the paint type and weather conditions, the surface may feel dry in a few hours but isn’t ready for handling or recoating. Rushing this step can cause uneven finish or damage to the paint film.
Recoat Windows: Most paints require a window of 4 to 24 hours before adding a second coat, depending on temperature and humidity. Following manufacturer guidelines ensures the layers bond properly and avoids bubbling or peeling.
Ensure Proper Cure Time for Full Strength: While the surface may appear done, it can take up to two weeks for full curing, especially in cooler or more humid climates. This slow hardening process is what gives professional wood house painting its lasting strength and weather resistance.
4. Final Walkthrough and Cleanup
After the painting work is complete, a professional team ensures everything meets expectations and no detail is overlooked. This final step is crucial in any professional wood house painting project, especially when dealing with exterior wood trim and fascia painting.
Reviewing Completed Work With the Homeowner
A professional painting service typically walks the property with the homeowner to evaluate the results of the wood exterior painting job.
Visual Inspection: Painters and the homeowner examine all painted surfaces to confirm color accuracy, clean lines, and full coverage. This includes checking detailed areas on trim and fascia to ensure the exterior wood painting services meet quality expectations.
Surface Check: The team checks for rough patches, uneven finishes, or missed spots that may need extra attention. Proper inspection helps ensure the wood exterior painting holds up well over time, especially in exposed areas.
Confirming Scope Completion: The completed work is compared against the initial agreement to ensure all areas, including fascia boards, trim, and detailed corners, were addressed. This step confirms the project was completed to the homeowner’s specifications and adheres to the promised service.
Ensuring Touch-Ups or Corrections are Made
No painting project is complete without making final adjustments. Even the best exterior wood painting services anticipate small imperfections that require fixing before considering the job done.
Touch-Up Requests: Any areas identified during the walkthrough that need correction are noted and handled promptly. This ensures a polished, uniform finish, especially on detailed parts like exterior wood trim and fascia painting.
Weatherproofing Recheck: Areas exposed to high moisture or direct sunlight are reviewed for proper sealing and durability, which is essential in weatherproof wood painting. Correct application of primer and paint helps protect wood from cracking, peeling, or absorbing water.
Detail Enhancements: Final details like paint drips, brush marks, or edge overlaps are fixed to maintain a clean finish. Attention to these small details ensures the professional wood house painting looks neat and lasts longer.
Clean-Up of Job Site and Disposal of Materials
After touch-ups are done, the cleanup phase begins. A professional team ensures the site looks as good as it did before the project started—or better.
Debris Removal: All tape, drop cloths, plastic sheeting, and paint containers are collected and taken off-site for proper disposal. This leaves the home’s exterior clean and avoids any hazards from leftover materials used during wood exterior painting.
Surface Cleaning: Any paint splatter on non-painted areas like windows, decks, or driveways is carefully removed. This protects nearby surfaces and maintains the home’s appearance following professional wood house painting.
Tool Collection: Ladders, brushes, and sprayers are packed up with care to avoid damage to fresh paint. Proper handling ensures the exterior wood painting services don’t unintentionally leave marks or scuffs during cleanup.
Leftover Paint Storage: If requested, any extra paint is labeled and left with the homeowner for future touch-ups. This is helpful for ongoing maintenance and can be especially useful when deciding on staining vs. painting exterior wood later on.
Frequently Asked Questions
Is it better to stain or paint weathered wood?
Staining is often better for weathered wood because it penetrates the surface and preserves the natural texture while offering moisture protection. However, paint can provide stronger UV protection and a more uniform appearance. For rough or heavily worn wood, staining is less likely to peel over time. The decision depends on the wood’s condition, desired look, and maintenance preference.
Can I just paint over old paint on wood?
Painting over old paint is possible if the existing layer is intact, clean, and not peeling. The surface should be cleaned, sanded lightly, and any loose paint removed. This allows better adhesion for the new coat and prevents early peeling. If the old paint is oil-based and a latex paint is being used, extra surface prep may be needed.
Can I paint over painted wood without a primer?
Painting over already painted wood without a primer can work only if the surface is in excellent condition and the new paint is compatible. However, primer improves adhesion, seals the surface, and helps achieve a more durable finish. Skipping primer can lead to peeling, uneven coverage, or faster wear.
How to paint weathered exterior wood?
Start by power washing or scrubbing the surface to remove dirt, mildew, and old flakes. Sand any rough or peeling areas, then repair cracks or soft spots. Apply a high-quality primer suited for weatherproof wood painting before adding two coats of exterior-grade paint. This process seals the surface and helps resist further weather damage.
What happens if you paint over rotted wood?
Painting over rotted wood traps moisture inside and speeds up the decay process. The paint will not adhere properly, leading to bubbling, peeling, or soft spots. Rotted areas should be removed and replaced before painting.
Book Trusted Local Experts for Exterior Wood Painting!
Rely on experienced professionals to handle every detail of exterior wood trim and fascia painting with care and precision. Trumbull House Painter Pros delivers high-quality results for homeowners across Trumbull, CT, using durable materials and weatherproof techniques suited for local conditions. Every project, from prep to cleanup, is backed by industry knowledge and a commitment to craftsmanship.
Get started today—request a free quote from Trumbull House Painter Pros!