
Key Takeaways
|
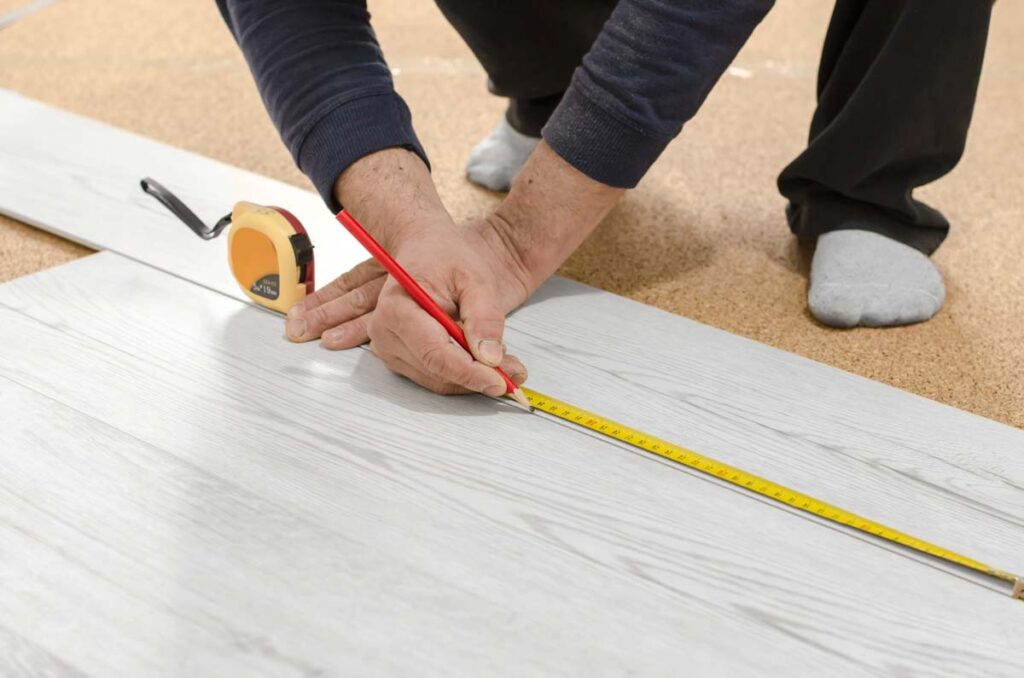
Trim and baseboards might seem like minor details, but they have a major impact on how polished and professional a room feels. Even the best wall color can look unfinished if the trim has brush marks, drips, or uneven edges. Achieving that clean, smooth finish takes more than just slapping on paint—it’s about technique, tools, and prep work that bring out the best results.
A smooth finish always starts with solid preparation. Skipping prep leads to uneven surfaces, visible cracks, and paint that won’t stick. The best professional home painters spend just as much time prepping as painting—because it matters.
The type of tool used on trim and baseboards makes a noticeable difference in the final finish. Some tools offer speed, while others provide more control. When it comes to brush vs. roller vs. spray painting, professional home painters choose based on the surface, paint type, and how much precision the job demands.
Primer isn’t just an optional step—it’s essential for a truly smooth and lasting finish. It seals the surface, creates a uniform base, and helps paint grip better. Without it, even the best paint can look uneven or dull on trim.
How paint is applied makes just as much difference as what paint is used. Technique affects texture, streaking, and even color depth. With trim and baseboards, attention to detail goes a long way.
The last steps make or break a polished trim job. This is where minor flaws get fixed, and the crisp look really comes together. Even the most skilled interior house painting services spend time here to make sure the project looks finished—not just painted.
Interior painting was the most popular home improvement project in the United States in 2020, and for good reason—it transforms a space quickly and effectively. But not all paints are made for the sharp, clean finish that trim and baseboards require. The right choice can improve durability, help hide flaws, and bring out the best in a room.
Paint sheen plays a big role in both the look and lifespan of trim. Semi-gloss and high-gloss finishes are popular because they’re easy to clean and reflect light, making edges pop. Many interior house painting services use semi-gloss for baseboards to balance smoothness with stain resistance in high-traffic areas.
Water-based (latex) paints dry faster, have lower odors, and clean up easily with soap and water. Oil-based paints offer a smoother finish with better leveling but take longer to dry and often require mineral spirits for cleanup. Professional home painters often recommend water-based paints for most home interior painting jobs due to their convenience and improved modern formulas.
Self-leveling paint spreads more evenly as it dries, reducing brush and roller marks. This feature is ideal for trim and baseboards, where smooth edges make a big visual impact. When combined with the right tool choice—brush vs. roller vs. spray painting—it enhances finish quality and cuts down on sanding between coats.
Some paints are labeled for “trim and doors” and contain additives that improve flow, adhesion, and durability. These options typically provide a harder finish, ideal for surfaces prone to bumps and scuffs. For smooth results, many interior house painting services and professional home painters rely on these specialty formulas during detailed home interior painting projects.
High-traffic areas like hallways, kitchens, and mudrooms need paints that hold up to frequent cleaning and contact. In these spaces, a tougher enamel or moisture-resistant formula is often best for trim and baseboards. A step-by-step home painting guide should always account for how each room is used before choosing paint.
Even a perfect paint job won’t look right if the color clashes with the wall or flooring. Choosing a trim color that complements the overall palette helps the room feel balanced and intentional. To tie the space together, smooth wall painting techniques on both walls and trim can make even bold contrasts feel refined.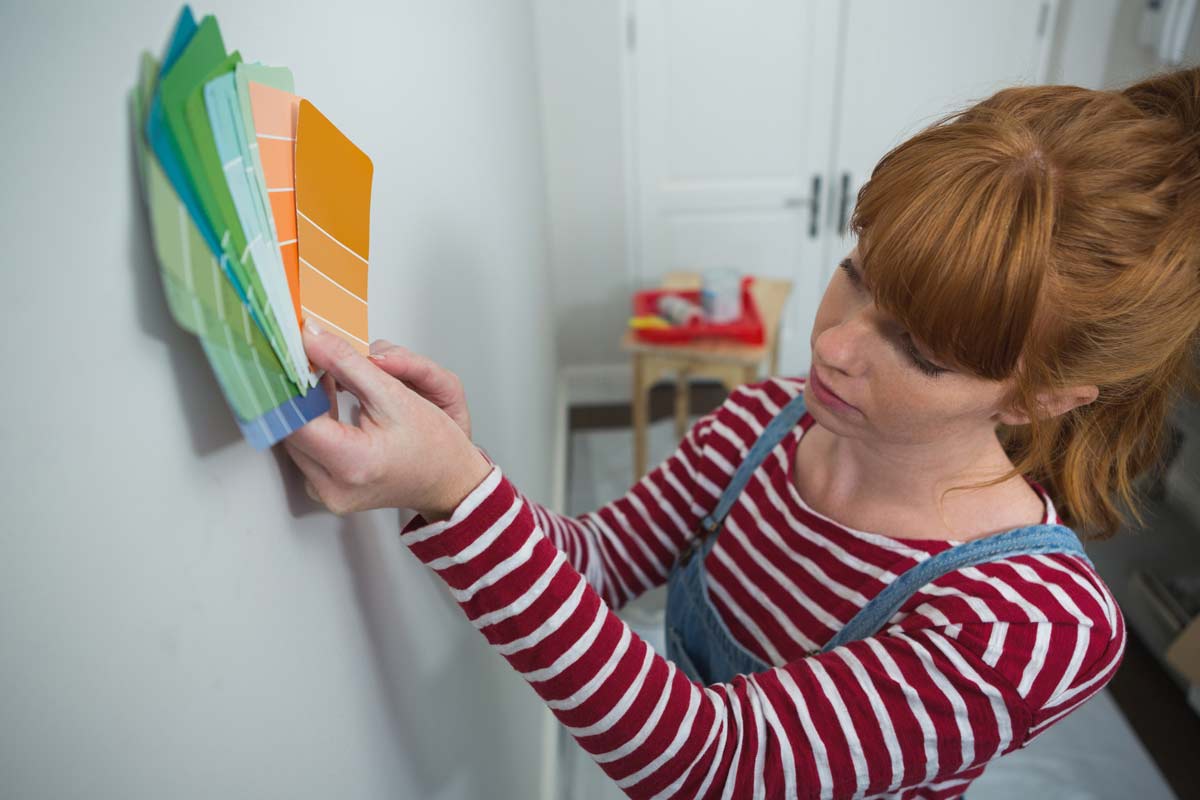
The color of trim and baseboards plays a big role in defining the look and feel of a room. This part of home interior painting is often overlooked, but professional home painters know that smart color pairing makes the difference between ordinary and standout results.
Choosing a trim color that contrasts with the wall paint draws attention to the room’s architecture. Bright white trim against dark or saturated walls creates a crisp, modern effect that feels clean and bold. Many interior house painting services use this approach in living rooms and hallways to help the space feel more structured.
Tonal color matching involves using different shades of the same color family for walls and trim. For example, pairing a soft gray wall with a deeper charcoal baseboard creates a subtle dimension without hard edges. This method is often used in step-by-step home painting guides to give bedrooms and offices a calm, cohesive vibe.
Painting both walls and trim the same color blurs the lines between surfaces, which can make rooms feel larger and more contemporary. This technique works best with matte or satin walls and semi-gloss trim to add slight variation in texture. When done correctly using smooth wall painting techniques, it gives a clean, uninterrupted look.
Trim color shouldn’t be chosen in isolation—it should relate to the floors, cabinetry, or window frames in the room. For example, warm-toned wood flooring pairs best with cream or off-white trim, while cooler-toned floors may benefit from bright white or even soft gray. Professional home painters often bring in color samples to test combinations under natural and artificial lighting.
Paint can look very different on a wall than it does on a swatch. Applying test patches of both wall and trim colors side by side is essential before making a final decision. Many interior house painting services include this step in consultations to help homeowners avoid regrets once the job is done.
Working with experienced painters or designers in Trumbull, CT, can unlock combinations that aren’t found in color charts. They often suggest trim colors that enhance wall tones and lighting conditions unique to the home. In home interior painting, the extra insight from professional home painters—along with guidance on techniques like brush vs. roller vs. spray painting—ensures the space doesn’t just look good—it feels right.
Regular maintenance prevents chips, scuffs, and fading—especially in busy parts of the home. For long-lasting results, professional home painters and interior house painting services recommend simple habits that protect the effort invested during the home interior painting process. This is crucial, as cost is largely driven by home size, averaging between $2 and $6 per square foot.
Harsh chemicals can dull the paint’s sheen or damage the surface. Instead, use a soft cloth with warm water and mild dish soap to wipe down baseboards and trim every few weeks. This is especially important after using smooth wall painting techniques, which highlight any buildup or residue.
Chairs, laundry baskets, and vacuum cleaners can easily chip or scuff painted trim. Using felt pads on furniture and being mindful during cleaning helps preserve the finish. Many professional home painters advise addressing scuff-prone zones early in the step-by-step home painting guide to reduce long-term wear.
Keeping a small amount of leftover paint on hand allows for quick fixes when nicks appear. Lightly sanding and recoating just the damaged area keeps the trim looking even and fresh. It’s a simple tip often shared by interior house painting services to maintain the integrity of the original finish.
Trim in kitchens, bathrooms, or laundry rooms is more prone to swelling, cracking, or peeling due to humidity. Sealing edges with a paintable caulk and using moisture-resistant paint adds extra durability. Home interior painting professionals often use special enamel formulas in these areas for longer-lasting results.
Exposure to direct sunlight can cause white or colored trim to yellow or fade. Regularly inspecting window frames and baseboards near natural light sources helps catch early signs of discoloration. When fading becomes noticeable, professional home painters recommend repainting with UV-resistant paint for improved performance.
A yearly walk-through with a trusted painter or interior house painting service can spot damage that might go unnoticed day to day. They’ll identify signs of wear, suggest repairs, and ensure all painted trim holds up well between major paint jobs. This kind of upkeep keeps the home’s overall smooth wall painting techniques intact and visually appealing.
Yes, trim can be painted while still attached to the wall as long as the surrounding area is properly protected. Taping off edges and using the right brush or sprayer helps achieve clean lines without removal. Many interior house painting services use this method for faster, more efficient home interior painting projects.
Painting trim before flooring installation avoids the risk of drips or scratches on new floors. However, if the floors are already in place, painters just need to mask off carefully to avoid damage. Professional home painters often adjust timing based on project scope in a step-by-step home painting guide.
Use a paintable acrylic latex caulk designed for interior trim work. It stays flexible over time and blends smoothly under paint when using smooth wall painting techniques. This small detail is something many home interior painting professionals consider essential for a polished look.
Trim paint may feel dry to the touch in hours, but full curing usually takes 7 to 30 days depending on the product. During this time, avoid scrubbing or heavy contact to prevent damage. Many interior house painting services inform clients about curing timelines as part of their professional home painters checklist.
Seal the paint tightly and store it in a cool, dry place away from sunlight or extreme temperatures. Label it with the room and date for future reference. Keeping extra trim paint is a smart move recommended in every reliable step-by-step home painting guide to make maintenance easier.
Let the experts at Trumbull House Painter Pros in Trumbull, CT, bring out the best in your home with precision trim and baseboard painting that elevates every room. Known for sharp lines, smooth finishes, and dependable results, our team blends skill and care in every project. Whether it’s part of a full home interior painting upgrade or a targeted refresh, our seasoned professionals handle the details that make a space feel complete.
